Building a Contact Form with Records
This guide will help you understand the process of building a contact form backed up with Record. Whenever you need to build a simple contact form, blog functionality, or complex API endpoint, you can define any data structure you need with Records.
Requirements
Steps
Building a Contact Form with Records is a nine-step process:
Step 1: Define Contact – Table
To define a new Table, create a YAML file in the schema directory. The name of your table will default to the name of your file. Therefore, create a file named app/schema/contact.yml. To build a Contact Form, you'll need an email of a person who submits the request (to be able to reply to them) along with their name, and the description of a problem. All of these Properties should be strings. The table definition should look as follows:
app/schema/contact.yml
name: contact
properties:
- name: name
  type: string
- name: email
  type: string
- name: description
  type: string
For more information on Properties please visit the Properties Documentation.
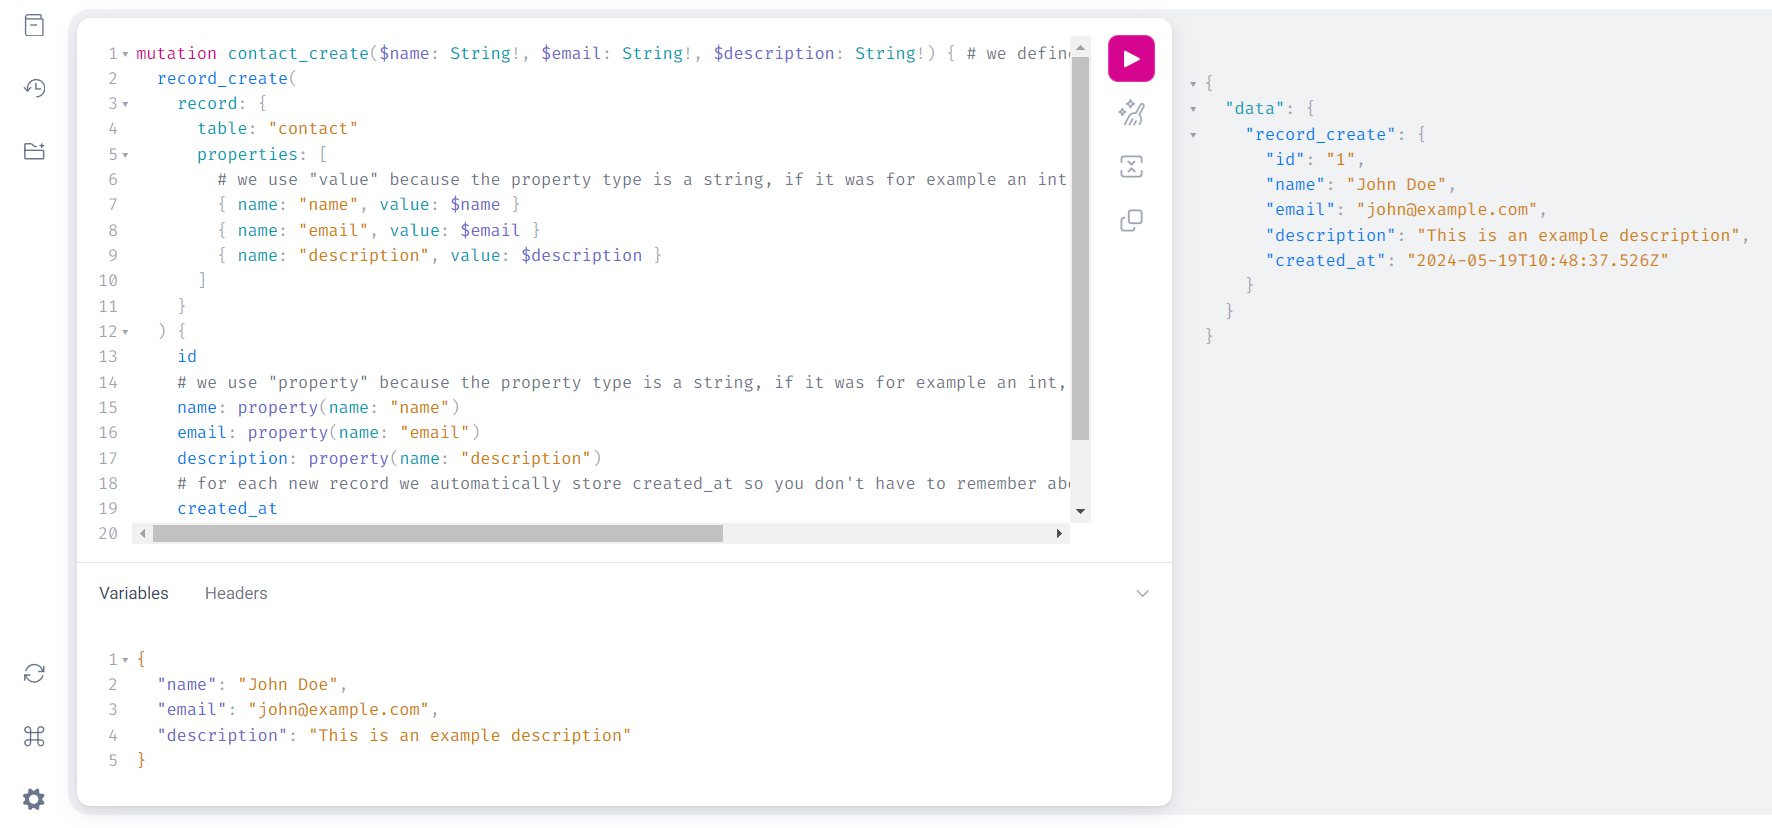
Step 2: Define GraphQL Mutation to Persist Records in Contact Table
With the Contact table defined, the next step is to create a GraphQL mutation to persist records in the database. To do it, use record_create GraphQL mutation. Create a file namedapp/graphql/contacts/create.graphql with the following content:
app/graphql/contacts/create.graphql
mutation contact_create($name: String!, $email: String!, $description: String!) { # we define arguments as mandatory by adding "!" after the type
  record_create(
    record: {
      table: "contact"
      properties: [
        # we use "value" because the property type is a string, if it was for example an int you would use value_int etc.
        { name: "name", value: $name }
        { name: "email", value: $email }
        { name: "description", value: $description }
      ]
    }
  ) {
    id
    # we use "property" because the property type is a string, if it was for example an int, you would use property_int
    name: property(name: "name")
    email: property(name: "email")
    description: property(name: "description")
    # for each new record we automatically store created_at so you don't have to remember about it
    created_at
  }
}
You can develop and run GraphQL queries and mutations using pos-cli gui serve:
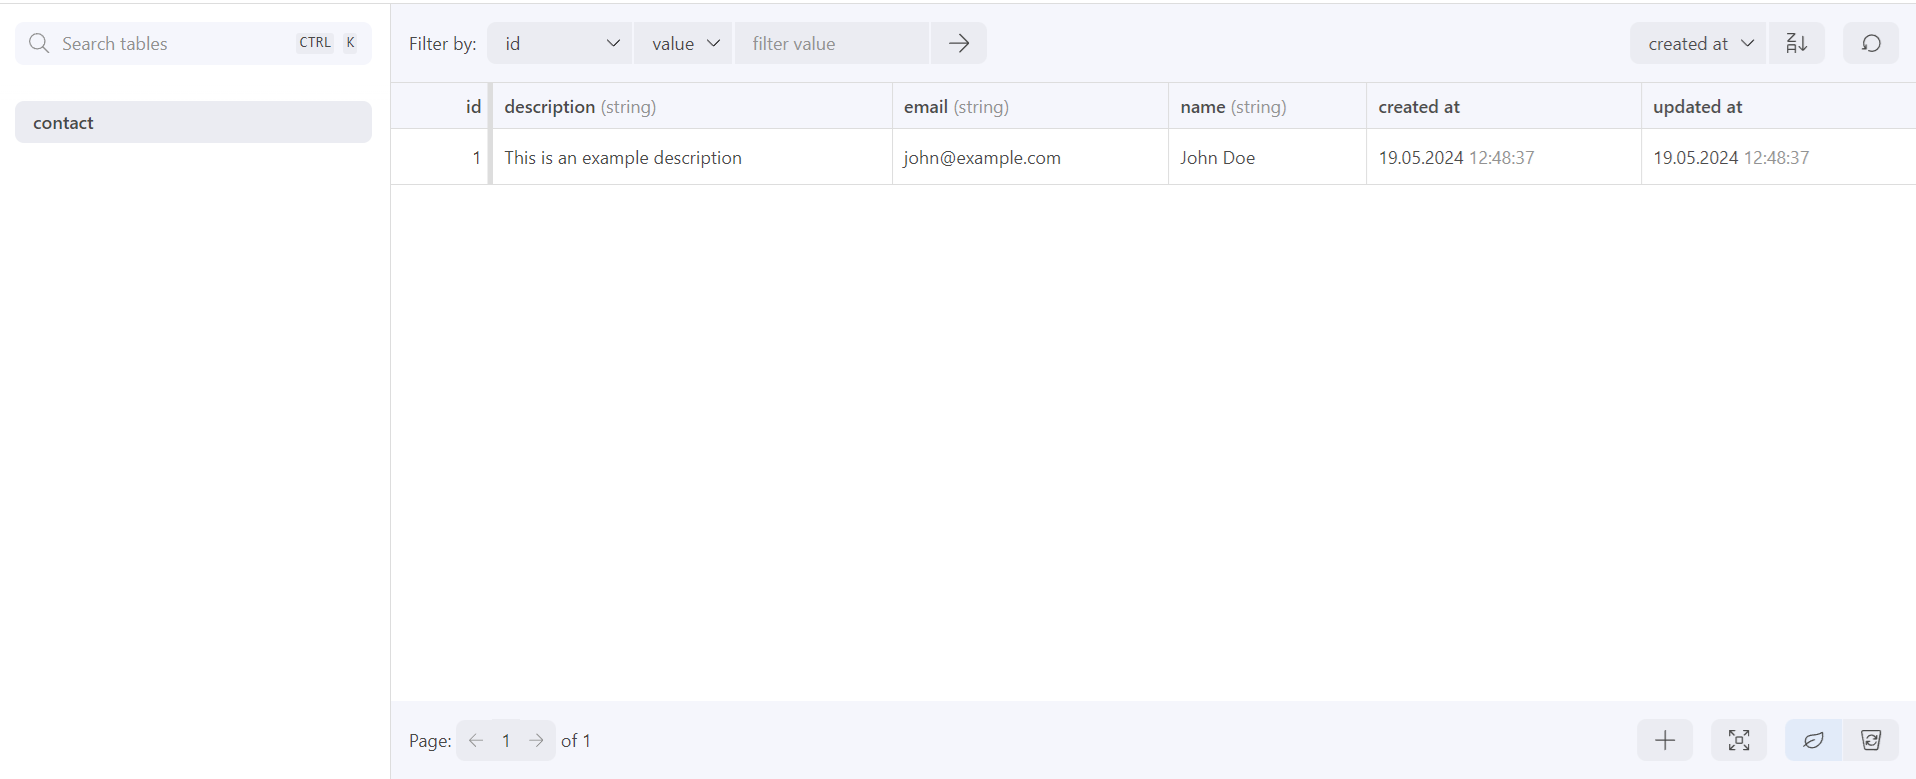
Upon successful invocation, you will be able to see the newly created record in the Database Management UI:
Step 3: Fetch Saved Data with GraphQL
Now that you have created the Contact Table, the next step is to fetch the data using GraphQL. To define the contacts/find query, create a file named app/graphql/contacts/find.graphql:
query contacts_find($id: ID) {
  records(
    filter: {
      table: { value: "contact" },
      id: { value: $id }
    },
    per_page: 100
  ) {
    results {
      id
      name: property(name: "name")
      email: property(name: "email")
      description: property(name: "description")
    }
  }
}
To check if the above query works properly you can head to the next section to learn how to embed query results with page view or use pos-cli gui
Step 4: Render Records Within a Page
Display contacts as a list with the possibility to get to the contact details view.
As a first step, you need two pages that will respond to given paths:
GET /contactsfor list viewGET /contacts/:idfor detail view
List View
Define the first endpoint in app/views/pages/contacts/index.liquid:
app/views/pages/contacts/index.liquid
{% liquid
  graphql g = "contacts/find"
  assign contacts = g.records.results
%}

<h1>List View</h1>
<table>
  <tr>
    <th>ID</th>
    <th>Email</th>
    <th></th>
  </tr>
  {% for contact in contacts %}
  <tr>
    <td>{{ contact.id }}</td>
    <td>{{ contact.email }}</td>
    <td><a href="/contacts/{{ contact.id }}">Details</a></td>
  </tr>
  {% endfor %}
</table>
This code runs a GraphQL query to fetch all contacts and displays them in a table. Each row includes a link to the detailed view of the contact.
Detail View
Define the detail view in app/views/pages/contacts/show.liquid:
app/views/pages/contacts/show.liquid
---
slug: contacts/:id
---
{% liquid
  graphql g = "contacts/find", id: context.params.id
  assign contact = g.records.results.first
%}

<h1>Detail view</h1>
<p>{{ contact.name }}</p>
<p>{{ contact.email }}</p>
<p>{{ contact.description }}</p>
This code runs a GraphQL query to fetch the contact details based on the id from the URL. The details are then displayed in a simple layout.
For more information, visit the Pages documentation. In a real-world application, you should ensure that only administrators have access to contact requests, and you should implement authentication and authorization. Additionally, you usually want to separate business logic from the presentation layer. We recommend not including HTML directly in the page and using Liquid Partials for presentation purposes. We recommend to treat the Page as a controller, that calls a partial to present the view.
Step 5: Build Contact Form with HTML
In Step 2, we created a GraphQL file named contacts/create, which corresponds to the relative path of the file in graphql directory. Now, we'll build an HTML form to allow users to submit their contact request information. Create a new page in app/views/pages/contacts/new.liquid with the following content:
<form action="/contacts" method="post">
  <input type="hidden" name="authenticity_token" value="{{ context.authenticity_token }}" />
  <label for="name">Name</label>
  <input name="contact[name]" id="name" type="text">

  <label for="email">Email</label>
  <input name="contact[email]" id="email" type="email">

  <label for="description">Description</label>
  <textarea name="contact[description]" id="description"></textarea>

  <button>Submit</button>
</form>
Each form field is marked as required to ensure that users provide the necessary information before submitting the form.
This piece of code ensures that the contact form is both functional and secure, integrating with the previously defined GraphQL mutation to handle the submission and persistence of contact data.
Note
Authenticity token is used to prevent Cross-Site Request Forgery (CSRF) attacks. It's included to ensure that form submissions are coming from authenticated users. If you don't include it, users might face session invalidation issues after submitting the form. You can learn more about it in chapter about
Step 6: Invoking GraphQL Server-Side
In the previous step, we created a form that, upon submission, triggers a POST request to the /contacts endpoint. The form values will be accessible via context.params. Since we namespaced all input names, the values submitted by the user will be available through context.params.contact. For example, context.params.contact.name will return the value entered by the user.
First, we need to create a page that will be invoked for the form submission:
app/views/pages/contacts/create.liquid
---
slug: contacts
method: post
---
{% liquid
  graphql g = "contacts/create", name: context.params.contact.name, email: context.params.contact.email, description: context.params.contact.description
  assign url = "/contacts/" | append: g.record_create.id
  redirect_to url
%}
After submitting the form from Step 5, the browser will send a POST request to /contacts. platformOS, via the GraphQL Liquid Tag, will invoke the contacts/create GraphQL mutation using the parameter mapping that was defined (e.g., the GraphQL email argument will have a value equal to context.params.contact.email).
Once the GraphQL mutation is invoked, the user will be redirected to /contacts/<id>, where id is the value of the newly created record.
Note
Providing manual mapping for each argument in GraphQL can be cumbersome. That's why there's a convenient args argument available. You can achieve the same result by using graphql g =
To confirm that everything works as intended, navigate to /contacts/new in your instance, complete the form, and submit it. You should be redirected to the show Page defined in Step 4, where you can review the information you submitted in the form. Furthermore, the new entry should be visible on the /contacts page.
Note
In practical scenarios, it
Step 7: Delete a Record
In order to remove record from the database, use record_delete GraphQL mutation.
Step 8: Update a Record
In order to update a record, use record_update GraphQL mutation. Only the properties explicitly defined in the GraphQL mutation will be updated. The properties you do not define as arguments will stay untouched.
Next steps
Congratulations! You have learned how to build forms and persist user input using Records. You can now explore our reference documentation for Properties and Tables: