Developing GraphQL Queries Using the pos-cli GUI
In this guide, we'll show you how to use the GraphiQL IDE (Integrated Development Environment) for GraphQL that is a part of the pos-cli tool.
The pos-cli gui serve command makes it easy to develop your GraphQL queries. It communicates with the platformOS environment by running GraphQL queries against it. This allows you to see a live preview of the data from your application.
It communicates with the database directly, eliminating errors caused by data passing through other layers or features of the system.
When you're debugging an error, you have direct control over the query and receive instant feedback after making changes. This allows you to simplify queries by removing unnecessary elements and adjusting the passed arguments.
Requirements
Before you begin, make sure you have the pos-cli installed and your environment is properly configured.
- Get Started Guide: Helps you gain access to our platform, set up a site, and install pos-cli.
- Technologies: See an overview of the technologies used in platformOS.
Starting the GUI
To start GraphiQL locally, run the pos-cli gui serve [environment] command.
Here's an example:
$ pos-cli gui serve staging
[18:05:01] Connected to https://documentation.platformos.com/
[18:05:01] Admin: http://localhost:3333
[18:05:01] ---
[18:05:01] GraphiQL IDE: http://localhost:3333/gui/graphql
[18:05:01] Liquid evaluator: http://localhost:3333/gui/liquid
Note
Replace staging with the environment you're working on. To view all available environments, use pos-cli env list.
Do not close your terminal or end the command — pos-cli gui serve must be running in the background for GraphiQL to work correctly.
To start using GraphiQL, open the URL with "graphql" in it: http://localhost:3333/gui/graphql.
You'll see the GraphiQL editor, where you can begin writing your queries.
Here’s how it looks with an example mutation already written, including query variables, documentation, and the explorer open:
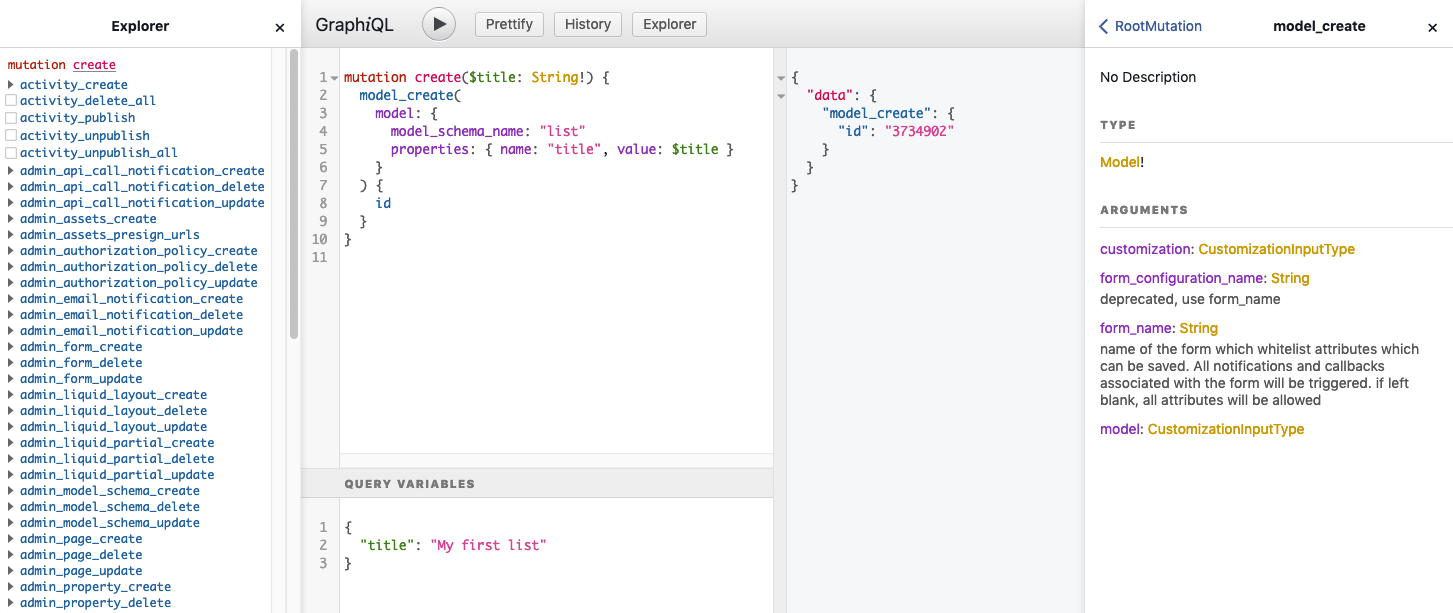
UI and features overview
Environment URL
The URL of the environment that GraphiQL is connected to is displayed when opened. This helps you avoid running queries on the wrong environment (for example, accidentally deleting data from production instead of development).
In the documentation example, you'll see: platformOS - https://documentation.platformos.com/.
Main editor window
The main editor window is where you type queries and mutations to run against the environment. It’s similar to a typical code editor, with features like line numbers, code folding, and useful keyboard shortcuts. Although not all shortcuts are listed in the official documentation, here are a few useful ones:
- CTRL+X (CMD+X on Mac) – Cut the line when nothing is selected
- CTRL+J (CMD+J on Mac) – Join the current line with the next line (removes line break)
- CTRL+/ (CMD+/ on Mac) – Comment or uncomment line(s)
- CTRL+] (CMD+] on Mac) – Indent the line by one level
- CTRL+[ (CMD+[ on Mac) – Unindent the line by one level
Running a Query
When you are ready to run a query, you can either press the "Play button" or use the keyboard shortcut CTRL+ENTER (CMD+ENTER on Mac). The results will be displayed on the right side of the window (grayed out).
If you have multiple queries in the editor, pressing the Play button will bring up a dropdown, allowing you to choose which query to run.
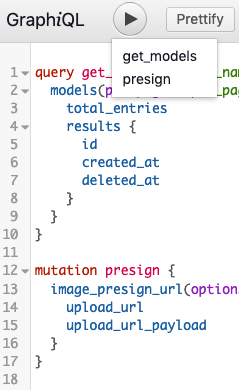
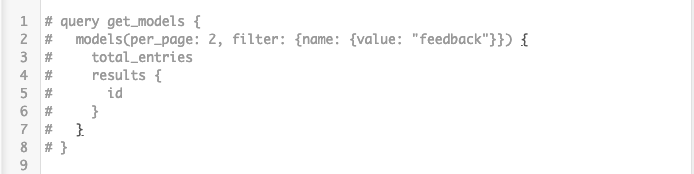
To avoid selecting queries manually, you can either remove unused queries or comment them out. In GraphQL, placing a # at the beginning of a line makes everything after it a comment.
If you're unsure what you can use at any given moment, press CTRL+SPACE to see autocomplete options. This allows you to write queries without needing to keep the documentation open.
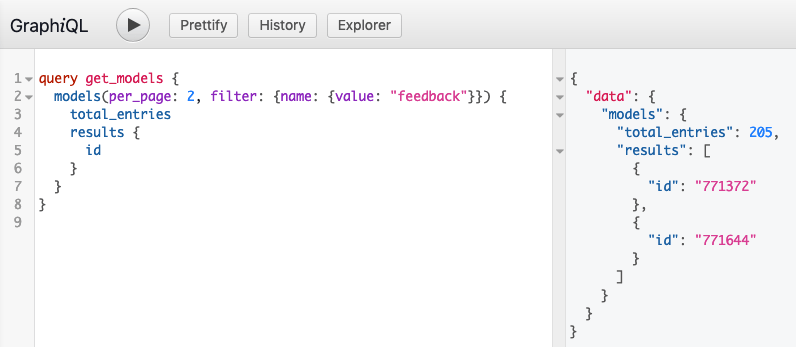
Default values
If your query or mutation accepts arguments, you can set default values. These defaults will be used if no argument is passed when the query is run.
Example of using default argument values:
query get_records($name: String = "feedback") {
  records(
    per_page: 10
    filter: {
      table: { value: $name }
    }
  ) {
    results {
      id
    }
  }
}
Note
Keep in mind that only non-required arguments can have default values. Required ones need to be populated from outside of the query, for example, from query variables.
Query variables
If you're developing a query that accepts arguments, you can pass them in the bottom section of the editor by clicking on "Query variables" to open it. It's the easiest way to pass required arguments without changing the query.
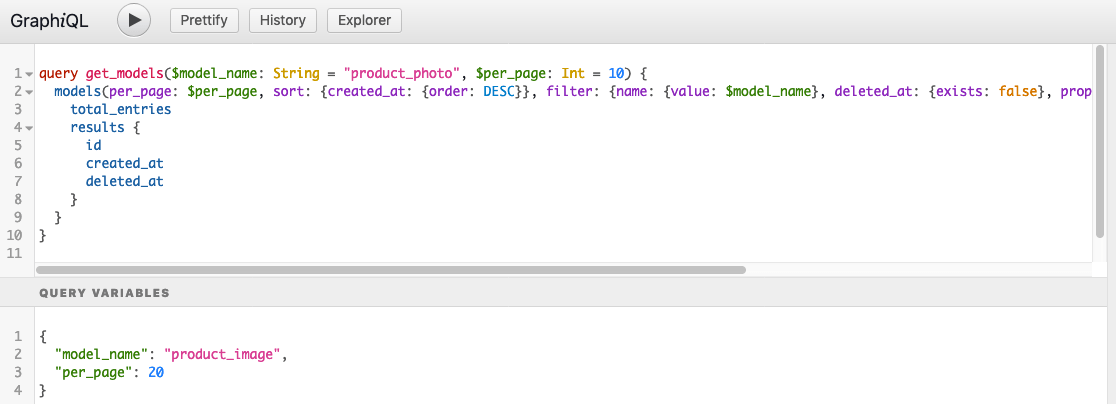
GraphQL queries accept JSON format, meaning the variables must be an object, and key names must be enclosed in double quotes. Valid JSON types for values include strings, numbers, and booleans.
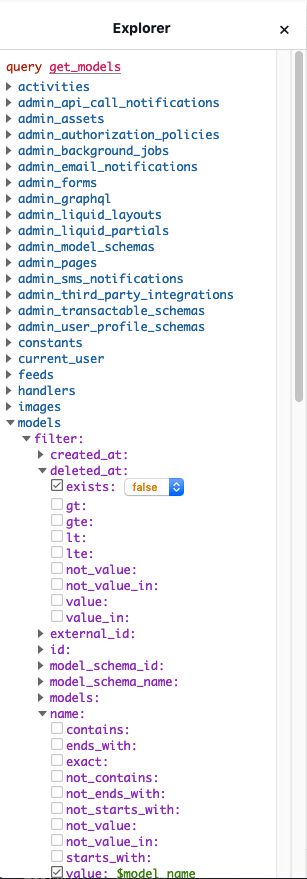
Explorer
The Explorer helps you build queries interactively. Open it by clicking on the "Explorer" button above the main editor window.
It has two main sections: queries and mutations. You can use checkboxes next to properties to build your query. Set values (or choose if it is an enum type) next to the property name. The query will automatically update in the main editor window.
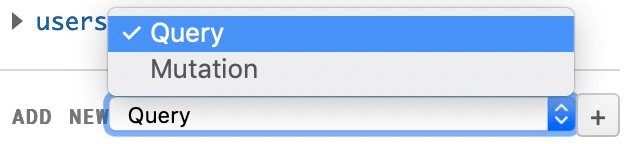
At the bottom of the explorer, you’ll find a dropdown to add a new query or mutation.
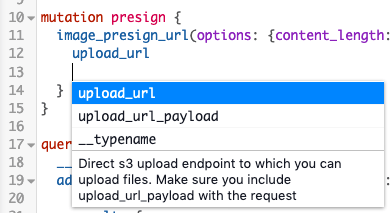
When you use this feature, it will create a new query in the main editor without a name, but with a placeholder property filled in. Don’t be intimidated by __typename; explore the endpoint you’re interested in if it’s unfamiliar. If the query isn’t needed, simply delete it from the main editor or comment it out.
Docs
On the right side of the screen, you’ll find built-in documentation generated from the GraphQL schema. It lists all available queries and mutations.ns:
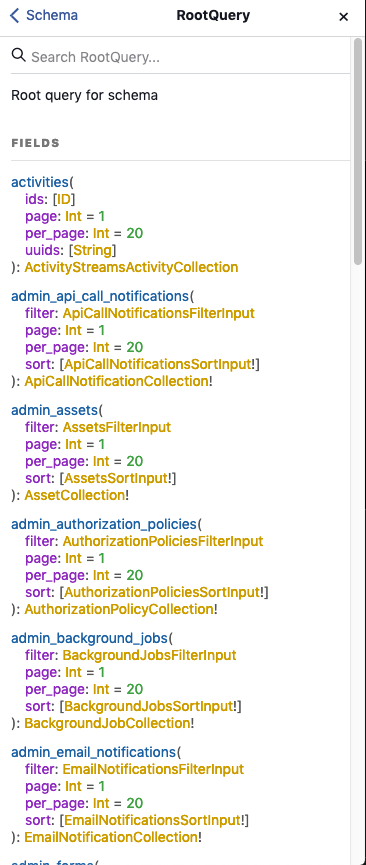
- Green values: Default values for a given argument.
- Values with
!: These are required arguments.
History
You can access past queries by clicking the "History" button. This shows you queries you’ve run across all environments.
Example of the history view:
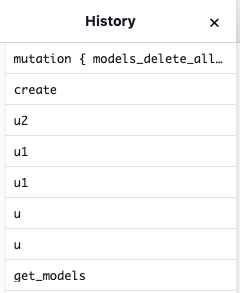
Named queries are displayed by their names, while unnamed ones display the beginning of the code.
Prettify
If you'd like to apply default code formatting provided by GraphiQL, click on the "Prettify" button at the top. While it’s not the most advanced formatting tool, it's useful for quick prototyping.
Once you're done with your query and have copied it to your .graphql file, we recommend using Prettier. Ideally, use a Prettier plugin for your favorite editor to format the code even more effectively and consistently, aligning with your code style guide.