Build a ToDo List App
Warning
This page is outdated. The examples in this guide still work, but you should check the new version of the Get Started guide here: https://documentation.platformos.com/get-started
Build a ToDo List App is the second part of our Get Started guide that walks you through the steps of creating a ToDo List app on platformOS from setting up your development environment to deploying and testing your finished app. It explains basic concepts, main building blocks, and the logic behind platformOS, while also giving you some recommendations on workflow.
Preview
You can preview the completed application you will be building based on this tutorial. Open this page and get yourself familiar with it — It will make it easier to imagine everything that will be described below.
Prerequisites
This tutorial assumes you have completed the Hello, World! tutorial.
The ToDo App will use a couple of basic building blocks available in platformOS:
- Records with simple one-to-many relation
- GraphQL Queries with basic filtering and sorting
- GraphQL Mutations to update your database
- Liquid filters
- Liquid tags
- Pages accepting GET, POST requests
- Query parameters parsing
- Static assets
Knowing most of the concepts will help you quickly understand what's going on. Knowledge of general web development concepts will also be helpful.
Frontend technology stack
For ease and speed of development a couple of tools have been used in this project.
- Skeleton - Minimalistic CSS boilerplate
- TailwindCSS - A utility-first CSS framework for rapidly building custom designs
- Alpine.js - A minimal framework for composing JavaScript behavior in your markup
If you find HTML code snippets that contain some data attributes or enigmatic CSS classes, those are TailwindCSS and Alpine.js in action. The functionality will work just fine without them, but we wanted to show a more user friendly experience without using heavy JavaScript frameworks.
Application functionality
It is a good practice to write down exactly what you want to build before you start writing your first line of code. This will help you in multiple ways, but most importantly, it will allow you to follow a plan when implementing, which translates to saving a lot of time and avoiding distractions.
Your ToDo App will allow users to:
And this is the order in which you will be implementing the application. Additionally, you will create GraphQL operations first, then pages that will trigger them.
File structure
The flexibility of platformOS allows you to merge a lot of these files, but for educational purposes we kept them all separate and categorized in resource-named directories (list, item).
This is what the file structure looks like for this particular application:
app/
├── assets
│   ├── css
│   │   └── app.css
│   └── js
│       └── app.js
├── graphql
│   ├── index.graphql
│   ├── item
│   │   ├── create.graphql
│   │   ├── delete.graphql
│   │   ├── read.graphql
│   │   ├── update_completed.graphql
│   │   └── update_content.graphql
│   └── list
│       ├── create.graphql
│       ├── delete.graphql
│       ├── read.graphql
│       └── update.graphql
├── schema
│   ├── item.yml
│   └── list.yml
└── views
    ├── layouts
    │   └── application.liquid
    └── pages
        ├── index.liquid
        ├── item
        │   ├── create.liquid
        │   ├── delete.liquid
        │   └── update.liquid
        └── list
            ├── create.liquid
            ├── delete.liquid
            ├── show.liquid
            └── update.liquid
Defining Records
To have a list, which contains items, you will need two Records.
- List, with a title
- Item, with content, completed status and list ID that specifies which list it belongs to
There are also some built-in fields that you do not have to define yourself, like created_at, deleted_at, updated_at, and id. They are populated automatically in the object lifecycle.
Developing GraphQL queries and mutations
To develop GraphQL queries we strongly recommend using our pos-cli gui serve [environment] tool. This will open the GraphiQL tool which speeds up development a lot. It has autocomplete, built-in documentation, live feedback and many more useful features.
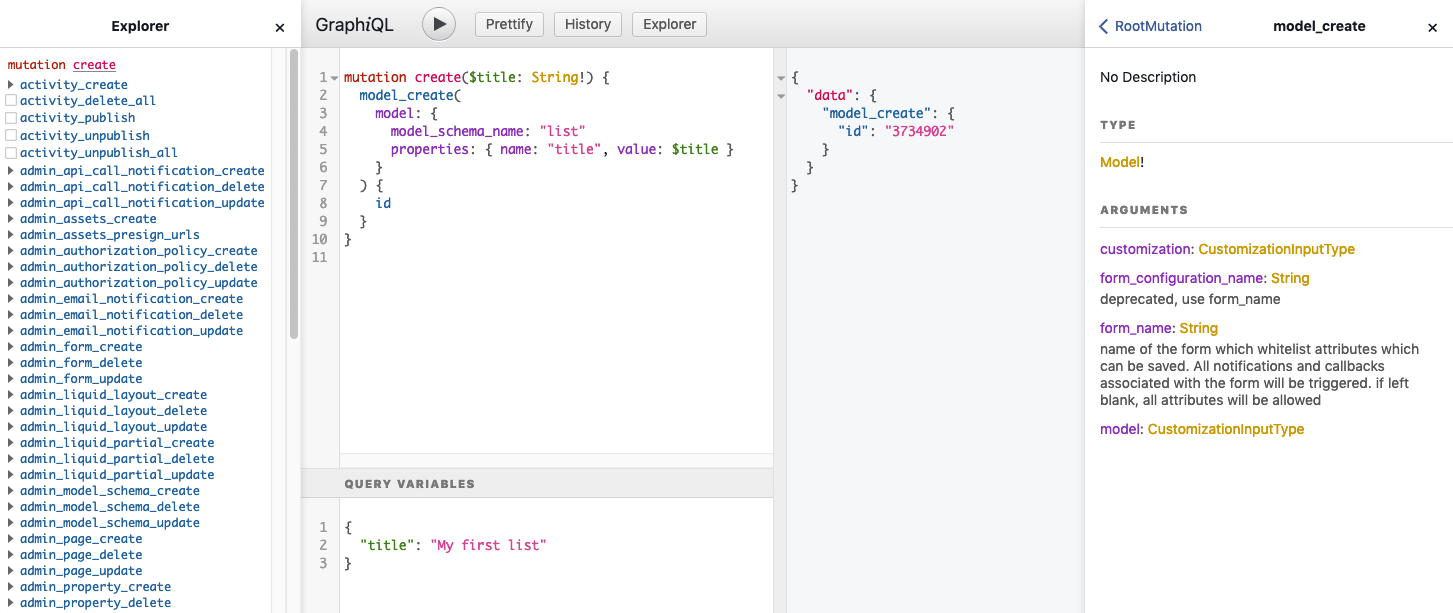
GraphiQL demonstration
After you have tested a query and it has proven to work with hardcoded parameters, you can safely copy it to a target file and reference it using the graphql Liquid tag.
For example:
graphql/list/create.graphql will be referenced this way: {% graphql result = 'list/create', title: title %}
Layout and homepage
Before you start implementing features, you need some ground work. A basic layout and a homepage should be enough to create the form to create a new list.
app/views/layouts/application.liquid
<!DOCTYPE html>
<html lang="en">

<head>
<title>TODO</title>
<link rel="stylesheet" href="{{ 'css/app.css' | asset_url }}">
<style> form, input { margin: 0; } </style>
<script src="{{ 'js/app.js' | asset_url }}" defer></script>
</head>

<body>

<div class="container">
  <p class="mt-8 button">
    🏠 <a href="/" class="text-2xl">Todoleo <small class="text-gray-500">beta</small></a>
  </p>

  {{ content_for_layout }}
</div>
</body>
</html>
app/views/pages/index.liquid
Hello world
Now when you go to the root URL of your Instance, Hello world is displayed. Now you have a place to put your content.
Tables
To create an object in the Database you need to define its structure. In this case you need two Records.
app/schema/list.yml
name: list
properties:
  - name: title
    type: string
app/schema/item.yml
name: item
properties:
  - name: list_id
    type: string
  - name: content
    type: string
  - name: completed
    type: boolean
Item needs the list_id field to be able to relate it to a list when querying for list items.
Step 1: Create new list
All database operations in this application follow the same structure and have the same parts:
-
GraphQL mutation
-
Page that accepts parameters and forwards them to GraphQL
-
HTML form that sends data to a page
app/graphql/list/create.graphql
 mutation create($title: String!) {
   record_create(
     record: {
       table: "list"
       properties: { name: "title", value: $title }
     }
   ) {
     id
   }
 }
app/views/pages/list/create.liquid
{% liquid
  assign title = context.params.title
  graphql result = 'list/create', title: title
  assign list = result | fetch: "record_create"
%}
{% if list.id %}
  <script>window.location.href = '/list/show/{{ list.id }}';</script>
{% else %}
  Something went wrong :(
  <br>
  {{ result.errors }}
{% endif %}
method: post allows you to accept post requests.
You are creating a list with a given title and using JavaScript to redirect the user to this list if there were no errors. If there is an error, the user will get an error returned by GraphQL. In a real application, you might want to handle this better.
app/views/pages/index.liquid
<form
  action="/list/create"
  method="POST"
  x-show="open === true">

  <input type="text" name="title" placeholder="List title" required>

  <button class="button-primary">Create</button>
</form>
The form action corresponds to the file location of the page from point 2. The page file is located in pages/list/create.liquid and its method is set to accept post, so you are sending a post request to the /list/create path. You also need to send the title field required by GraphQL, so you use input with type text and validate its existence client-side by adding the required attribute.
You can find a lot of data attributes (like x-data, x-show, @click) which are non standard. Those are Alpine.js directives that allow you to quickly add basic interactivity in HTML markup. No build process necessary. It is a perfect tool for this use case.
Step 2: View all lists
Now that you can create a list with a title, show 10 of them on your homepage, sorted by those which had been recently updated.
app/graphql/index.graphql
 query index {
   records(
     per_page: 10
     filter: {
       table: { value: "list" }
       properties: { name: "title", exists: true }
     }
     sort: { updated_at: { order: DESC } }
   ) {
     results {
       id
       title: property(name: "title")
     }
   }
 }
app/views/pages/index.liquid
 {% graphql lists = 'index' | fetch: 'records' | fetch: 'results' %}

 {% if lists.size > 0 %}
   <ol>
     {% for list in lists %}
       <li>
         <a href="/list/show/{{ list.id }}">{{ list.title }}</a>
       </li>
     {% endfor %}
   </ol>
 {% else %}
   <p>There are no lists yet. You can create the first one!</p>
 {% endif %}
You iterate over the array returned by GraphQL and inform the user that there is nothing to show if the array is empty.
Step 3: Display list
Now that you have a link pointing to /list/show/{{ list.id }}, you need to create this page to be able to show a particular list.
app/graphql/list/read.graphql
 query read($id: ID!) {
   records(
     per_page: 1
     filter: {
       table: { value: "list" }
       id: { value: $id }
     }
   ) {
     results {
       id
       title: property(name: "title")
     }
   }
 }
app/views/pages/list/show.liquid
 {% liquid
   assign id = context.params.slug3
   graphql list = 'list/read', id: id | fetch: 'records' | fetch: 'results' | first
 %}

 <h2 class="mb-0 mr-10">{{ list.title }}</h2>
These couple of lines of code pull the correct list object from the database and shows its title.
Step 4: Rename list
To rename a list, you need to update its title field. As usual, you need a GraphQL mutation, a page, and a form.
app/graphql/list/update.graphql
 mutation update($id: ID!, $title: String!) {
   record_update(
     id: $id
     record: { properties: { name: "title", value: $title } }
   ) {
     id
     title: property(name: "title")
   }
 }
Note that ID is required as well, because you have to tell the system which list has to be modified.
app/views/pages/list/update.liquid
 ---
 method: post
 ---
 {% liquid
   assign id = context.params.slug3
   assign title = context.params.title
   graphql result = 'list/update', id: id, title: title
   assign list = result | fetch: "record_update"
 %}

 {% if list.id %}
 <script>window.location.href = '/list/show/{{ id }}';</script>
 {% else %}
 Something went wrong :(
 <br>
 {{ result.errors }}
 {% endif %}
Errors are handled the same way as previously.
app/views/pages/list/show.liquid
<form
  method="POST"
  action="/list/update/{{ list.id }}"
  x-show="open === true"
  class="flex w-full mt-4">

  <input type="text" name="title" placeholder="New title" value="{{ list.title }}" class="w-2/3" required>

  <button class="ml-2 button-primary">Save</button>
</form>
Code for renaming a list is in the list/show.liquid page, that's why you have access to {{ list.id }}.
Step 5: Delete empty list
Because you did not connect any tasks to your lists, all of them are empty. This means you can easily implement a delete feature.
app/graphql/list/delete.graphql
 mutation delete($id: ID!) {
   record_delete(id: $id) {
     id
   }
 }
app/views/pages/list/delete.liquid
 ---
 method: post
 ---
 {% liquid
   assign id = context.params.slug3
   graphql result = 'list/delete', id: id
   assign list = result | fetch: "record_delete"
 %}

 {% if list.id %}
 <script>window.location.href = '/';</script>
 {% else %}
 Something went wrong :(
 <br>
 {{ result.errors }}
 {% endif %}
After deleting a list, the user will be redirected to the homepage.
app/views/pages/list/show.liquid
 {% if items.size > 0 %}
 ...
 {% else %}

 <p>
   Because this list is empty, you can remove it.
 </p>

 <form action="/list/delete/{{ list.id }}" method="POST">
   <button>Delete</button>
 </form>

 {% endif %}
You show the delete form only when there are no tasks associated with the list.
Step 6: Create task
Now that you have all your list operations ready, start handling items.
app/graphql/item/create.graphql
 mutation create($list_id: String!, $content: String!) {
   record_create(
     record: {
       table: "item"
       properties: [
         { name: "list_id", value: $list_id }
         { name: "content", value: $content }
       ]
     }
   ) {
     id
     list_id: property(name: "list_id")
     content: property(name: "content")
   }
 }
app/views/pages/item/create.liquid
 ---
 method: post
 ---
 {%
   assign list_id = context.params.slug3
   assign content = context.params.content
   graphql result = 'item/create', list_id: list_id, content: content
   assign item = result | fetch: "record_create"
 %}

 {% if item.id %}
 <script>window.location.href = '/list/show/{{ list_id }}';</script>
 {% else %}
 Something went wrong :(
 <br>
 {{ result.errors }}
 {% endif %}
To create a task attached to a list, you need the list's ID. It is passed in the URL and accessed as context.params.slug3. After creation, the user is redirected back to the list.
app/views/pages/list/show.liquid
<form
  action="/item/create/{{ list.id }}"
  method="POST"
  x-show="open === true">

  <input type="text" name="content" placeholder="Your task" required>

  <button class="button-primary">Create</button>
</form>
Step 7: Mark task as complete
app/graphql/item/update_completed.graphql
 mutation update($id: ID!, $completed: Boolean!) {
   record_update(
     id: $id
     record: {
       properties: [
         { name: "completed", value_boolean: $completed }
       ]
     }
   ) {
     id
   }
 }
app/views/pages/item/update.liquid
 ---
 method: post
 ---
 {%- assign id = context.params.slug3 -%}

 {% if context.params.completed %}
   {%- assign completed = context.params.completed | matches: '1' -%}
   {% graphql result = 'item/update_completed', id: id, completed: completed %}
 {% endif %}

 {% assign item = result | fetch: "record_update" %}

 {% if item.id %}
 <script>window.location.href = '/list/show/{{ context.params.list_id }}';</script>
 {% else %}
 Something went wrong :(
 <br>
 {{ result.errors }}
 {% endif %}
GraphQL is expecting Boolean, so you need to convert "1" to true. If the completed parameter doesn't have "1" inside of it, the completed variable will resolve to false, and the task will be marked as uncompleted.
app/views/pages/list/show.liquid
<form
 action="/item/update/{{ item.id }}"
 method="POST"
 class="text-center">

 <input type="hidden" name="completed" value="0">
 <input
   type="checkbox"
   name="completed"
   value="1"
   onchange="this.form.submit()"
   class="w-8 h-8"
   {% if item.completed == true %}checked{% endif %}
 />
 <input type="hidden" name="list_id" value="{{ list.id }}">
</form>
Knowledge of HTML forms and tricks around them helps keep your code clean here.
To have two states using checkbox, you are sending a "0" value to the server (hidden field). If the user checks the checkbox (note: the same name, "completed". Unchecked checkbox value is not sent), then the last input of that particular name takes precedence.
This means: If a form is submitted when the checkbox is checked, the value from the checkbox is sent (completed: "1"). If the user did not check the checkbox (or unchecked it), the value of the hidden field is sent (completed: "0").
Additionally, you submit the form as soon as the user checks/unchecks the checkbox using the onchange attribute and a little JavaScript, so a submit button is not necessary.
Step 8: Edit a task's content
app/graphql/item/update_content.graphql
 mutation update($id: ID!, $content: String!) {
   record_update(
     id: $id
     record: {
       properties: [
         { name: "content", value: $content }
       ]
     }
   ) {
     id
   }
 }
app/views/pages/item/update.liquid
 ---
 method: post
 ---
 {% liquid
   assign id = context.params.slug3
   assign content = context.params.content
 %}

 {% if content.size > 0 %}
   {% graphql result = 'item_update_content', id: id, content: content %}
 {% endif %}

 {% assign item = result | fetch: "record_update" %}

 {% if item.id %}
 <script>window.location.href = '/list/show/{{ context.params.list_id }}';</script>
 {% else %}
 Something went wrong :(
 <br>
 {{ result.errors }}
 {% endif %}
You might have noticed that the above filename is the same as in the one in the previous step. Because it is, we just separated it for the purposes of this tutorial, but in source code and in real application, both updates are handled in the same page, using one if statement.
app/views/pages/list/show.liquid
<form
 method="POST"
 action="/item/update/{{ item.id }}"
 x-show="open === true"
 class="flex w-full">

  <input type="text" name="content" value="{{ item.content }}" required class="w-1/2" />
  <input type="hidden" name="list_id" value="{{ list.id }}">

 <button class="ml-2 button-primary">save</button>
</form>
Step 9: Delete a task
app/graphql/item/delete.graphql
 mutation delete($item_id: ID!) {
   record_delete(id: $item_id) {
     id
   }
 }
app/views/pages/item/delete.liquid
 ---
 method: post
 ---
 {%- assign item_id = context.params.slug3 -%}
 {%- assign list_id = context.params.list_id -%}

 {% graphql result = 'item_delete', item_id: item_id %}
 {% assign item = result | fetch: "record_delete" %}

 {% if item.id %}
 <script>window.location.href = '/list/show/{{ list_id }}';</script>
 {% else %}
 Something went wrong :(
 <br>
 {{ result.errors }}
 {% endif %}
app/views/pages/list/show.liquid
<form action="/item/delete/{{ item.id }}" method="POST">
  <input type="hidden" name="list_id" value="{{ list.id }}">
  <button>delete</button>
</form>
By now you are probably familiar with the steps required.
Source code
Warning
The code included in this tutorial is not complete. It showcases every concept once to present the idea. To have a working example go to the source code and deploy it to your own Instance.
Take a look at the source code. Feel free to clone it, deploy it to your own Instance, and modify/extend it to build your own practical skillset on platformOS.