Installation and Configuration
There are three key steps for starting development on platformOS:
- Signing up on the Partner Portal
- Creating an instance
- Installing the platformOS command-line interface
Sign up on the Partner Portal
The Partner Portal is an online interface where you can create, manage, and configure your sites.
To interact with platformOS you will need to have an account, so the very first thing you need to do is register on the Partner Portal.
Make sure to verify your account by following the instructions in the email we send you after registration.
Create an instance
To start working with platformOS, you need to create an instance where you’ll run your code and store files.
Tip
Each separate site that you can create in the Partner Portal is called an instance.
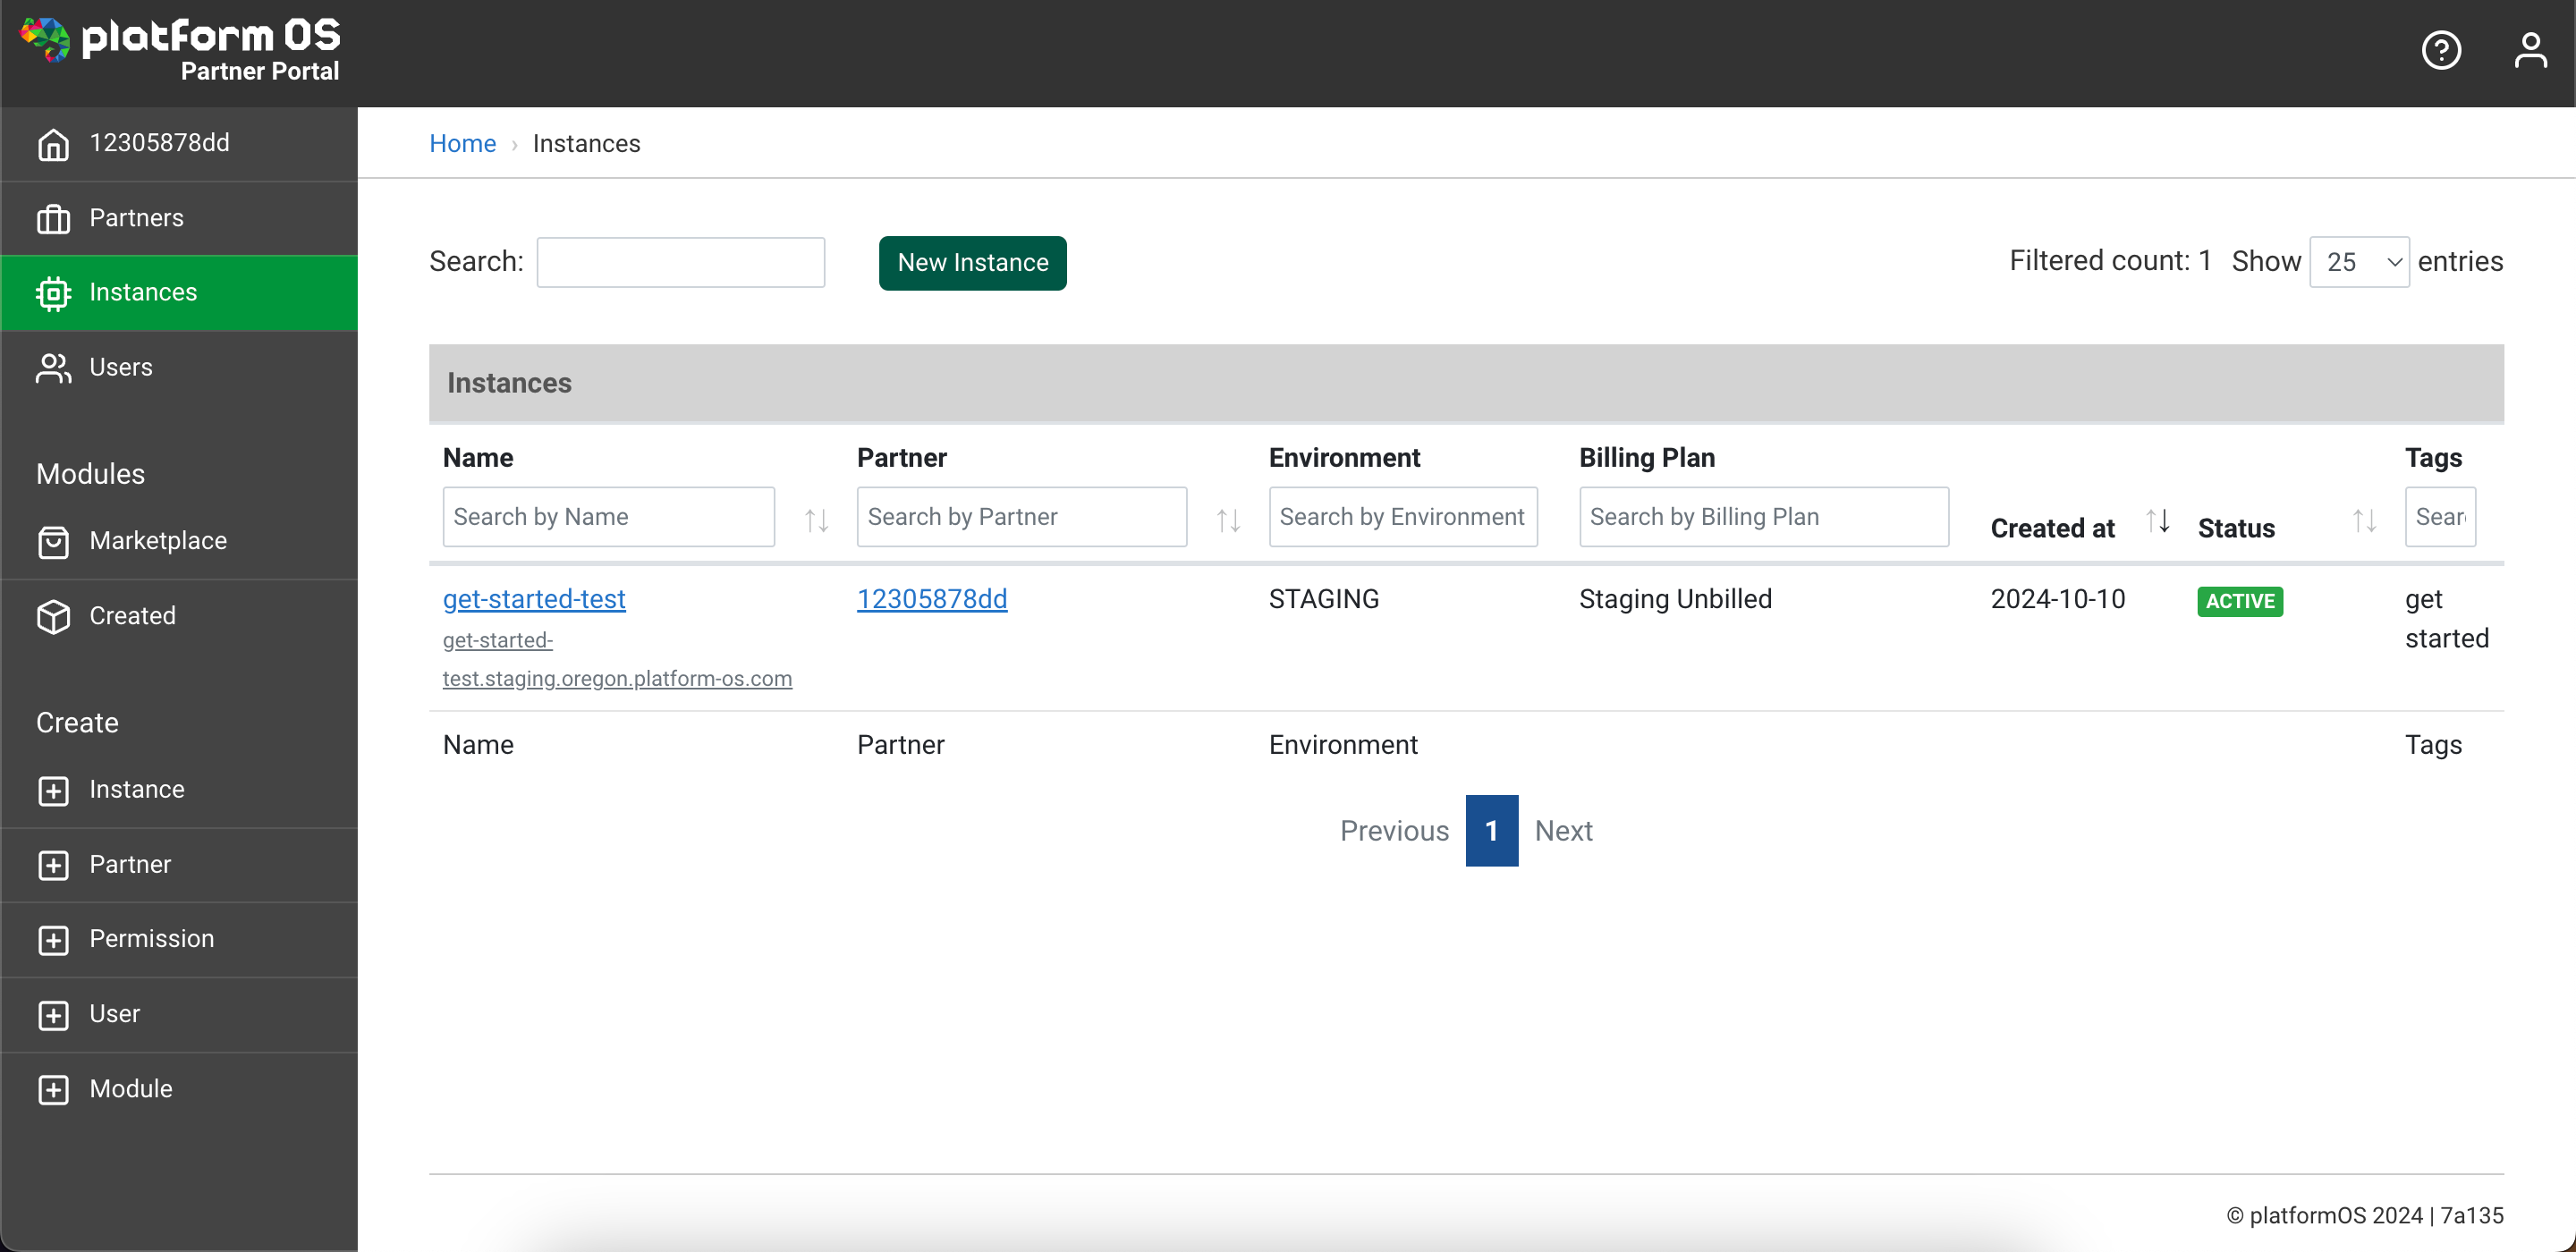
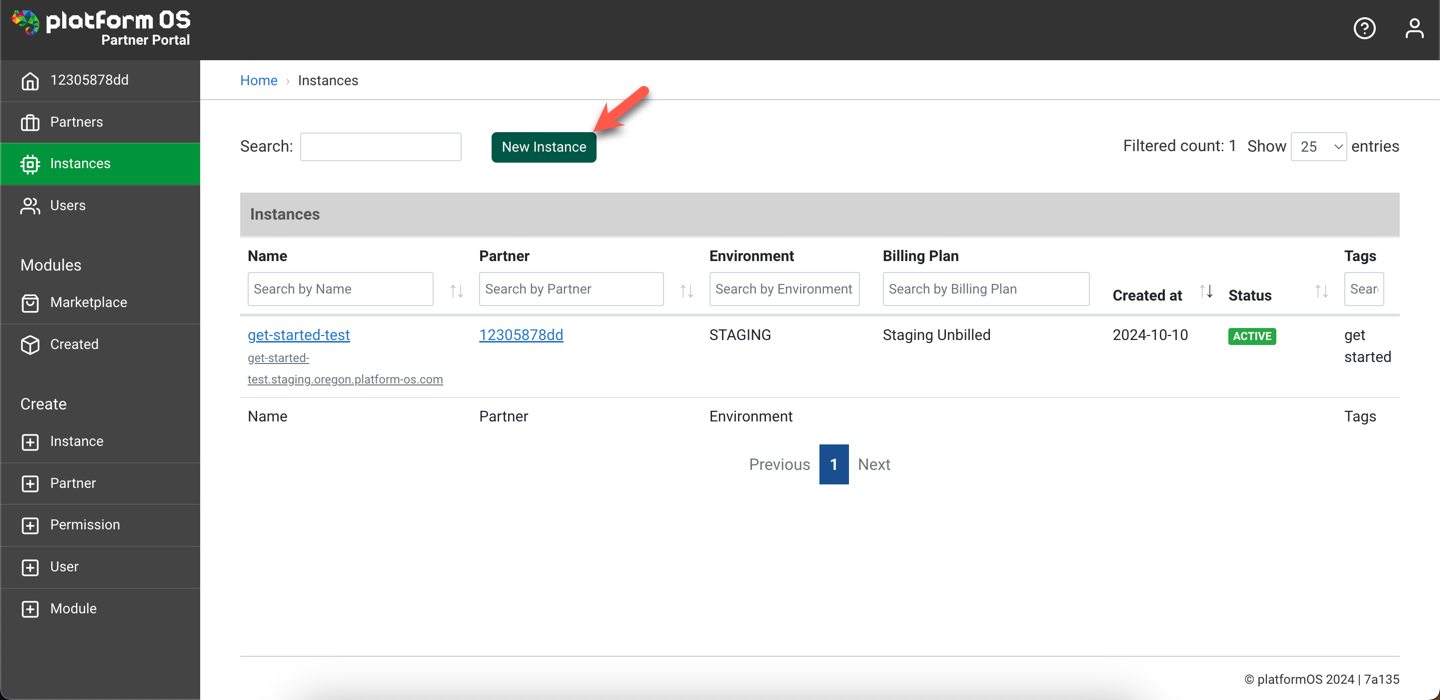
To create a new instance, log in to the Partner Portal. By default, you will see your list of instances after logging in. Click on the New Instance button above the instances list.
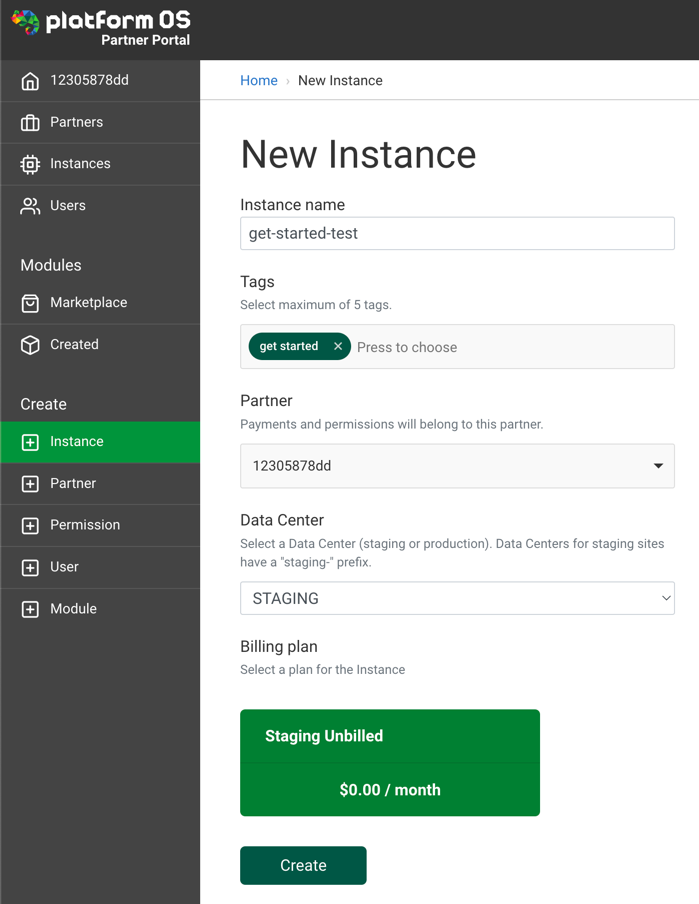
The Instance name can be any name of your choice. The other options you’ll need to select are the Data Center and Billing plan. For this scenario, use the Staging environment, which is a completely free environment designed for testing and development.
Select the Staging data center and choose the Staging Unbilled plan to create your first instance.
In the list of instances, your instance may initially be marked with the SCHEDULED_TO_ACTIVATE status. This process usually only takes a few seconds.
After a short while, refresh the page, and the status should change to Active. This means you can visit the instance URL listed and check if it’s working. This URL is important, as you’ll see all your code changes reflected here.
Install pos-cli
The platformOS command line interface – or pos-cli – is a tool that allows you to interact with your instance.
The pos-cli offers a variety of options that you can explore later in this guide or directly in the pos-cli documentation.
For detailed usage instructions and advanced options, make sure to read the README of the pos-cli on GitHub.
To install pos-cli, you need a recent version of NPM (Node Package Manager) installed on your system. NPM is distributed with Node.js, so we recommend following the official guide for installing Node.js and NPM. If you get lost there, the easiest way is to use the Node.js installer, which functions like any other program installer.
Once Node.js is installed, you can verify the installation by checking the versions of Node.js and NPM. Open your command-line tool of choice and run:
node -v
npm -v
Both commands should return a version number. If they do, you're ready to install pos-cli:
npm install -g @platformos/pos-cli
The -g attribute installs the tool globally, which may require higher system permissions. On Unix-based systems, use sudo, and on Windows, you may need to run the command-line tool as an administrator (this option is available in the right-click context menu).
sudo npm install -g @platformos/pos-cli
After installing pos-cli, verify the installation by running the following command:
pos-cli -v
If everything was installed successfully, you’ll see the version number of the pos-cli tool displayed (for example, 4.7.1).