Using Events to Send Confirmation Email
In the next step, we need to ensure that once a user submits their contact information, they receive a simple static email confirmation acknowledging that their contact request has been received. This is where Events come into play.
About Events
Events in platformOS allow you to record that something has happened in the system. Think of them as logs that capture these actions. When an event occurs, other parts of the application might need to react to it. These events are stored using GraphQL mutations and can include various arguments detailing the specifics of what happened.
Practical Uses of Events
- Form Submissions: When a user submits a contact form, an event can log this action and trigger follow-up actions such as sending a confirmation email or updating a CRM system.
- Data Processing Completion: Once a background job processes data, an event can signal completion, notifying other systems or updating the user interface to reflect the new data.
- Real-Time Updates: Events can send real-time notifications to users, such as alerts for new messages, status updates, or system alerts.
Note
For further details, refer to the core module’s documentation about Events.
Create the directory structure
First, we create the necessary directory for storing the event files:
mkdir -p app/lib/events/contacts
Create the Event file
Within the events directory, create a file named contact_created.liquid:
app/lib/events/contact_created.liquid
Define the Event
You don’t need to write the event from scratch, you’ll find an example event template in the core module documentation.
Open your contact_created.liquid file and paste the following code into it:
app/lib/events/contact_created.liquid
---
metadata:
  event:
    foo_id
---
{% liquid
  assign c = { "errors": {}, "valid": true }

  function c = 'modules/core/validations/presence', c: c, object: event, field_name: 'foo_id'

  # You can also enhance event object
  assign event['bar'] = 'extra info'

  return c
%}
In this scenario, we want to define an event that captures when a contact form has been submitted. The crucial piece of information to store for this event is the contact ID because it serves as a unique identifier.
With the contact ID, you can
- Fetch the contact details from the database.
- Retrieve the email address of the user who submitted the contact form.
- Access the message body.
- Check the timestamp of the submission.
Modify the code to the following:
app/lib/events/contact_created.liquid
---
metadata:
  event:
    id
---
{% liquid
  assign c = { "errors": {}, "valid": true }

  function c = 'modules/core/validations/presence', c: c, object: event, field_name: 'id'

  return c
%}
When the contact form is successfully submitted, the event is logged with the necessary contact ID. This note allows the system to track the submission and perform any required follow-up actions, such as sending a confirmation email or updating the user interface. Let’s see what we’ve done here:
---
metadata:
  event:
    id
---
This block specifies that the event will include an id field, which represents the contact ID.
{% liquid
  assign c = { "errors": {}, "valid": true }

  function c = 'modules/core/validations/presence', c: c, object: event, field_name: 'id'

  return c
%}
The Liquid code snippet validates the presence of the id field. Here's a step-by-step breakdown of what happens:
assign c = { "errors": {}, "valid": true }
This line initializes a hash object c with an empty errors hash and sets valid to true.
function c = 'modules/core/validations/presence', c: c, object: event, field_name: 'id'
To ensure the contact ID is provided and valid, we use validation checks. The presence validation confirms that the contact ID is included in the event data.
return c
The function returns the validation result, including any errors and the valid status.
Publish the Event
After defining and validating the event, the next step is to publish it. Publishing an event means notifying the system that something significant has happened, like the submission of a contact form. This step helps in tracking actions and triggers any required follow-up processes, such as sending confirmation emails or updating statuses.
Copy the following code snippet from the core module documentation for publishing an event:
  assign object = null | hash_merge: foo_id: "12345"
  function _ = 'modules/core/commands/events/publish', type: 'something_happened', object: object
Paste the copied code into your app/lib/commands/contacts/create.liquid file. This file already has the commands for building, checking, and executing the contact creation process. Integrate the publishing step as shown below:
app/lib/commands/contacts/create.liquid
{% liquid
  function object = 'commands/contacts/create/build', object: object
  function object = 'commands/contacts/create/check', object: object

  if object.valid
    function object = 'commands/contacts/create/execute', object: object
    assign event_object = { "id": object.id }
    assign event_object["email"] = object.email
    function _ = 'modules/core/commands/events/publish', type: 'contact_created', object: event_object, delay: null, max_attempts: null
  endif

  return object
%}
To ensure the email notification is sent correctly, we need to update the event object to include the necessary information, such as the contact's ID and email. This will allow the email template to access these details directly.
To minimize the data included in the event object, we created a new, simplified object that only contains the necessary fields. This ensures efficiency and clarity:
{% assign event_object = { "id": contact.id } %}
We create a new hash object containing only the id of the contact. This ensures that our event object only includes the contact's ID and nothing else.
With this solution, we are avoiding the inclusion of unnecessary and potentially lengthy data such as the full contact body. However, by simplifying our event object, we no longer have direct access to some properties like the contact's body and email. While the event retains some built-in fields, it lacks the extra information we need.
To address this, we will add the contact's email to the event object:
{% assign event_object["email"] = contact.email %}
Adding the email directly to the event object means we don't have to go back to the database to get it later. This saves us from having to do an extra database query to find the email using the contact ID. It makes things simpler because now the email is right there in the event, ready to be used whenever we need it.
{% function _ = 'modules/core/commands/events/publish', type: 'contact_created', object: event_object %}
We used the updated event object to publish the event.
Understanding the publish function
The publish function in the platformOS core module serves to create and store events, allowing you to track and respond to significant actions in your application.
It operates in the background, ensuring it doesn't block the main execution flow. This means that while your application continues to run, the event is logged in parallel.
Following the command pattern, publish calls the events/create function defined in the core module. This modular approach allows for clear, maintainable code.
The event logs the timestamp and the object provided (in this case, the contact ID). This logging mechanism helps in tracking the sequence of actions and debugging issues.
Instead of creating a database record, the event is stored in an activity stream. This stream captures the payload (contact ID) and the event name (contact_created).
function object = 'commands/contacts/create/build', object: object
This line invokes the build command to construct the contact object.
function object = 'commands/contacts/create/check', object: object
This line validates the contact object to ensure all required fields are present and correct.
Conditional Execution and Event Publishing
if object.valid
  function object = 'commands/contacts/create/execute', object: object
  function _ = 'modules/core/commands/events/publish', type: 'contact_created', object: object
endif
- If the object is valid, the
executecommand is invoked to persist the contact information. - The
publishfunction is then called to record the eventcontact_createdwith the contact object.
Once the event is created, you don't need to take any additional actions immediately. The main purpose of creating this event is to have a record that you can use later for various purposes, such as debugging or auditing.
If you need to check or debug the process, you can refer to the event to see when and where each action was invoked. For instance, if the event indicates that an order was placed, you could then send a confirmation email to the buyer. If something goes wrong in the process, the event log will help you pinpoint where the issue occurred. By logging every action, such as address verification or credit card submission, you can identify exactly where the process stopped working as expected. This detailed tracking makes it easier to diagnose and resolve issues.
Viewing and managing Events
In the core module, there's a built-in UI that displays all events.
To access the Events UI, add /_events to the end of your instance's domain in the browser's address bar.
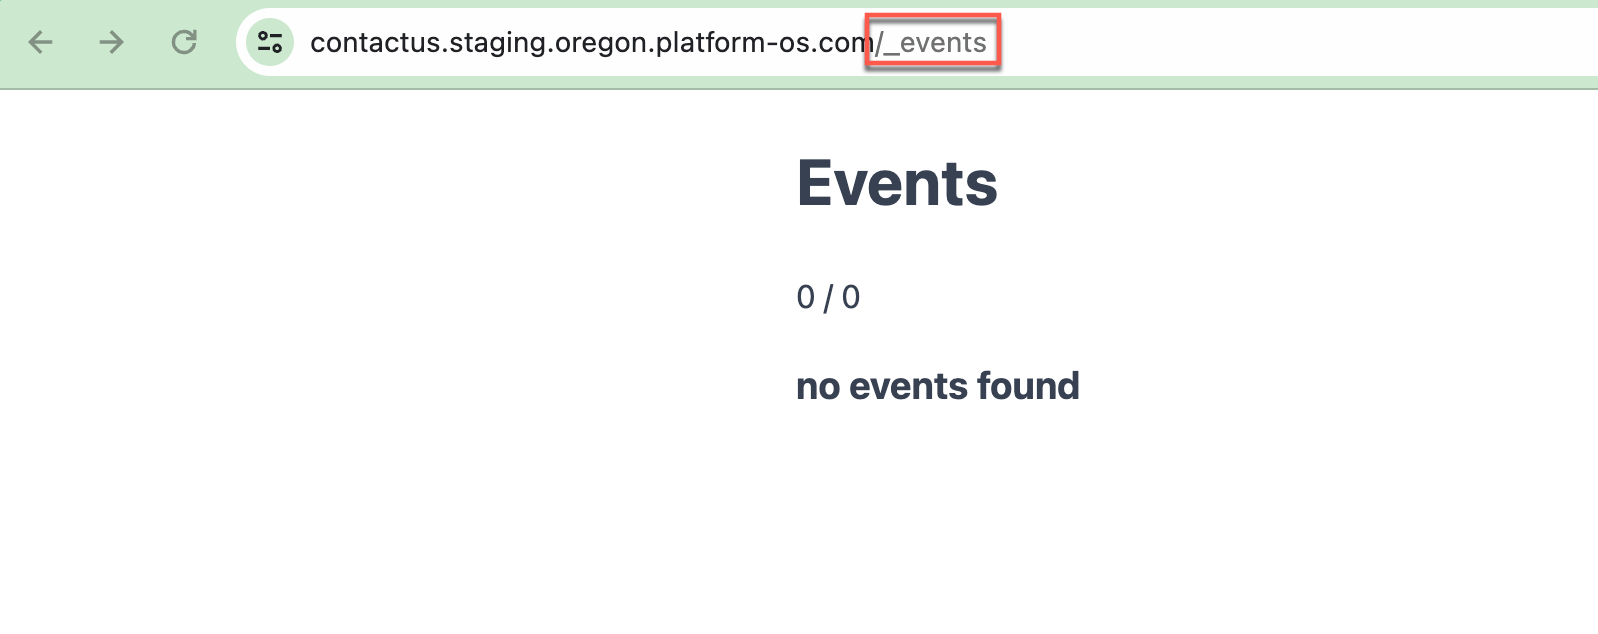
Initially, you won't see any events because they haven't been created yet. However, after submitting the form, you will start seeing events with their details, including the date and associated properties.
Test Events
Let’s test it! Submit the form with valid data, then navigate to /_events. You should see something similar:
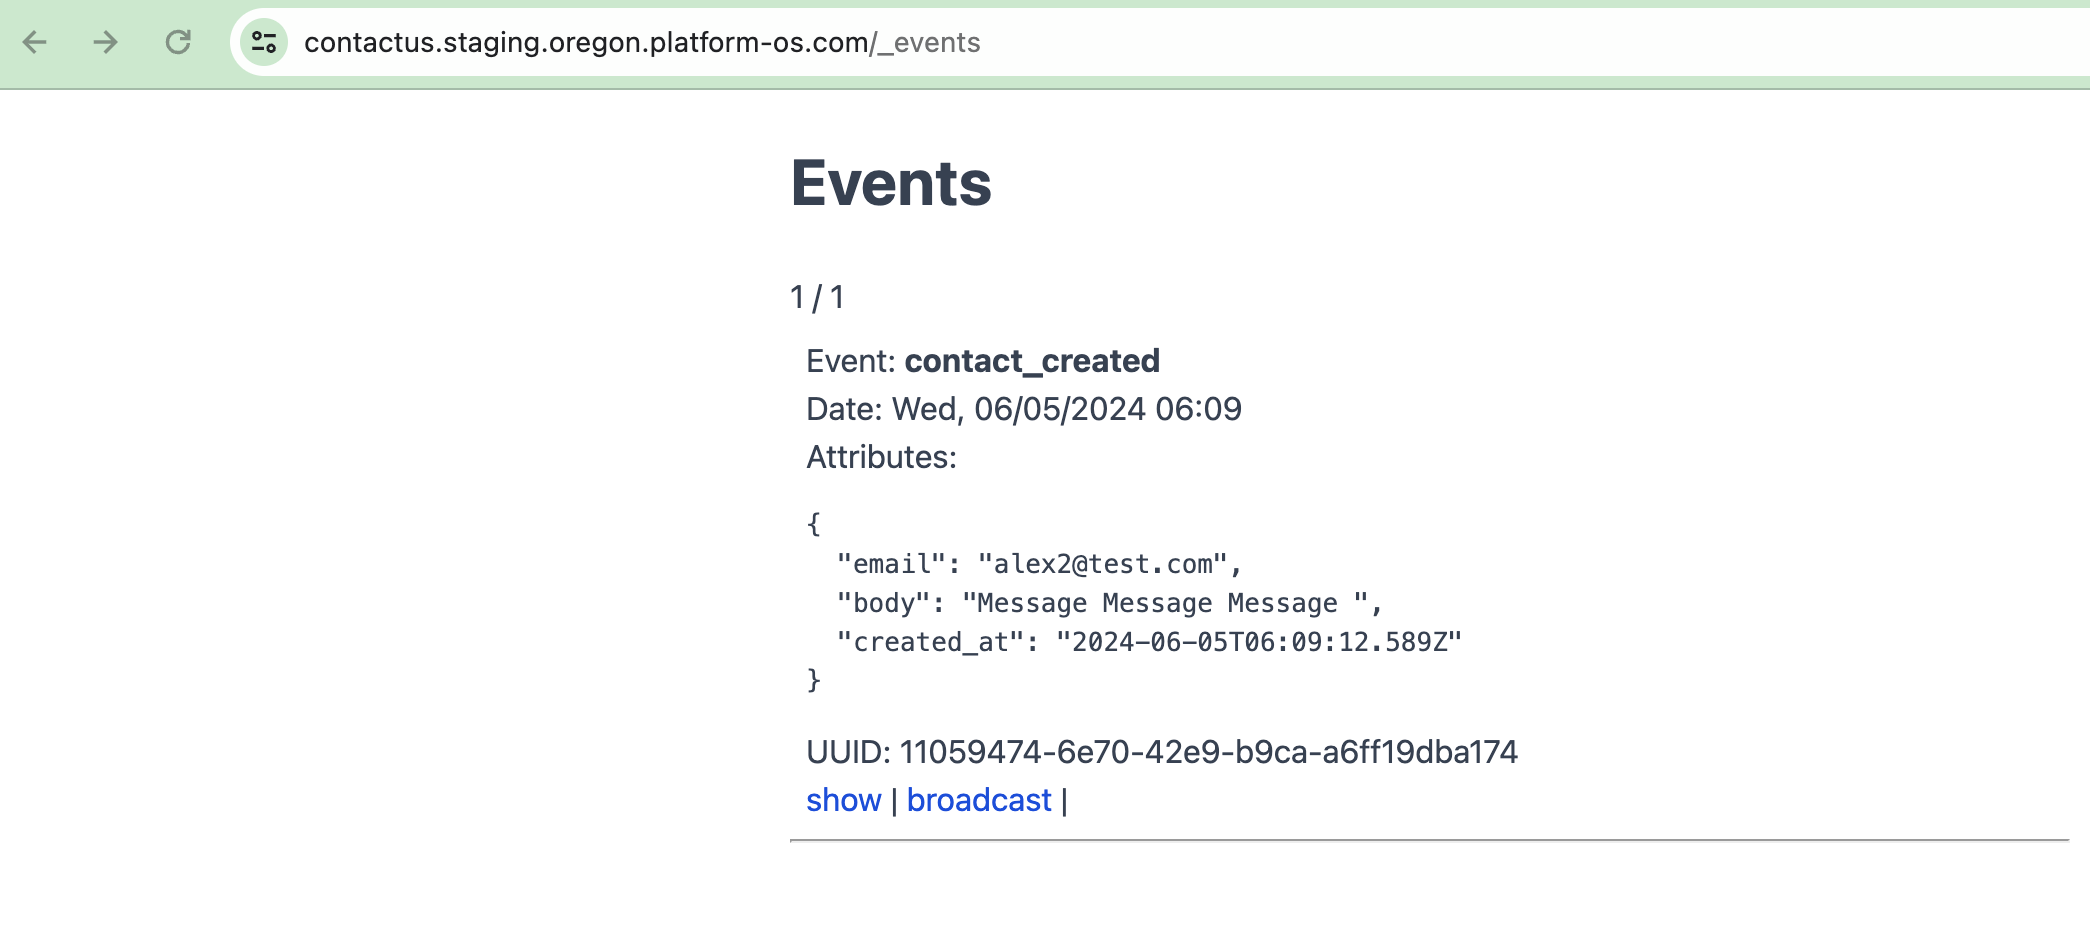
When you submit the form, an event is created. One of the key benefits of using events is that you can create consumers that handle tasks asynchronously. For example, when a contact form is submitted, you might want to perform several actions, but it's better to handle these tasks outside of the main command to keep the command clean and efficient.
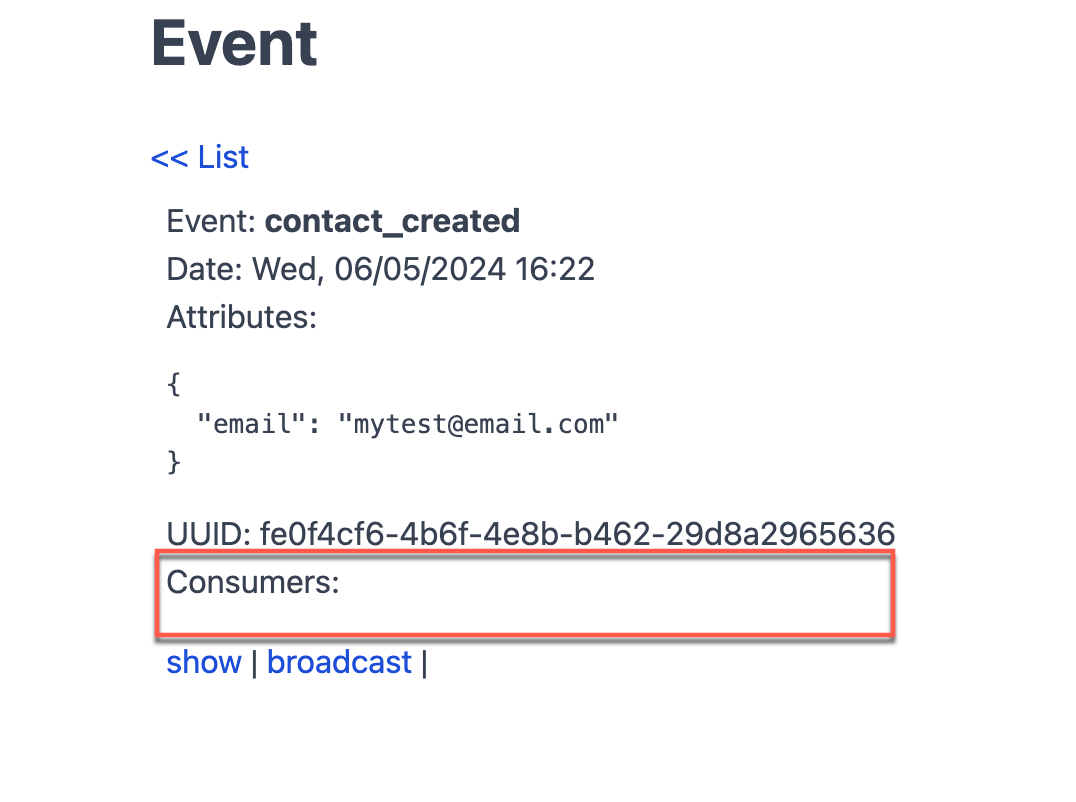
To get more details about an event, click on show. This will display the event’s consumers. If there are no consumers, it will indicate as such.
Note
You can also re-trigger the event by clicking broadcast. For example, imagine something went wrong with a third-party system that the event was supposed to call. By using the "broadcast" feature, you can easily re-trigger the event, ensuring it calls the external system again without duplicating the data. This feature is very useful for maintenance, as it allows you to handle failures and re-run events as needed.
Moving Event handling to the page
Now our event is working, but invoking these actions immediately within the command can lead to issues. For example, you might want to create a contact without sending an email to the customer during tests.To solve this, we will move event handling out of the command and into the page itself.
Note
Refer to the Handling Events section of the core module documentation for more details.
Update the create.liquid file located at app/views/pages/contacts/create.liquid as follows:
app/views/pages/contacts/create.liquid
---
method: post
---
{% liquid
  function contact = 'commands/contacts/create', object: context.params.contact
  if contact.valid
    redirect_to '/contacts/thanks'
  else
    render 'contacts/form', contact: contact
  endif
%}
In this updated code, if the contact is successfully created and stored in the database, the event is broadcasted before redirecting to the thank you page. This ensures that the user receives a thank you message promptly, and any follow-up actions, such as sending an email, are handled asynchronously.
Tip
Using events in this way provides an additional layer of abstraction and debugging. Events are stored, allowing you to check which events were created and which consumers were notified. This makes it easier to reason about the code and handle asynchronous tasks efficiently.
Create the Event Consumer
To execute code on a particular event, you need to create a consumer. There can be multiple consumers for one event. We want to handle the contact_created event, so let’s create a consumer that sends an email notification to the submitter.
Using events in this way provides an additional layer of abstraction and debugging. Events are stored, allowing you to check which events were created and which consumers were notified. This makes it easier to reason about the code and handle asynchronous tasks efficiently.
Note
To create a consumer, create a file in app/lib/consumers/<name_of_the_event>/<name_of_your_file>.
Create the following directories:
mkdir -p app/lib/consumers/contact_created
Create the consumer file:
app/lib/consumers/contact_created/notify_submitter.liquid
This file will be executed asynchronously whenever the contact_created event is triggered. This approach ensures that the user does not have to wait for the email to be sent before receiving a confirmation message.
Note
Any Liquid file inside the directory that corresponds to the name of the event will be executed asynchronously whenever the event is triggered. This is a best practice for actions like sending emails because it allows the user to receive immediate feedback without waiting for all background tasks to complete.
By organizing your event handling this way, you ensure that actions are executed efficiently and maintainably, enhancing both user experience and system reliability.
Refer to the Handling Events section of the core module documentation for more details.
Test the Event Consumer
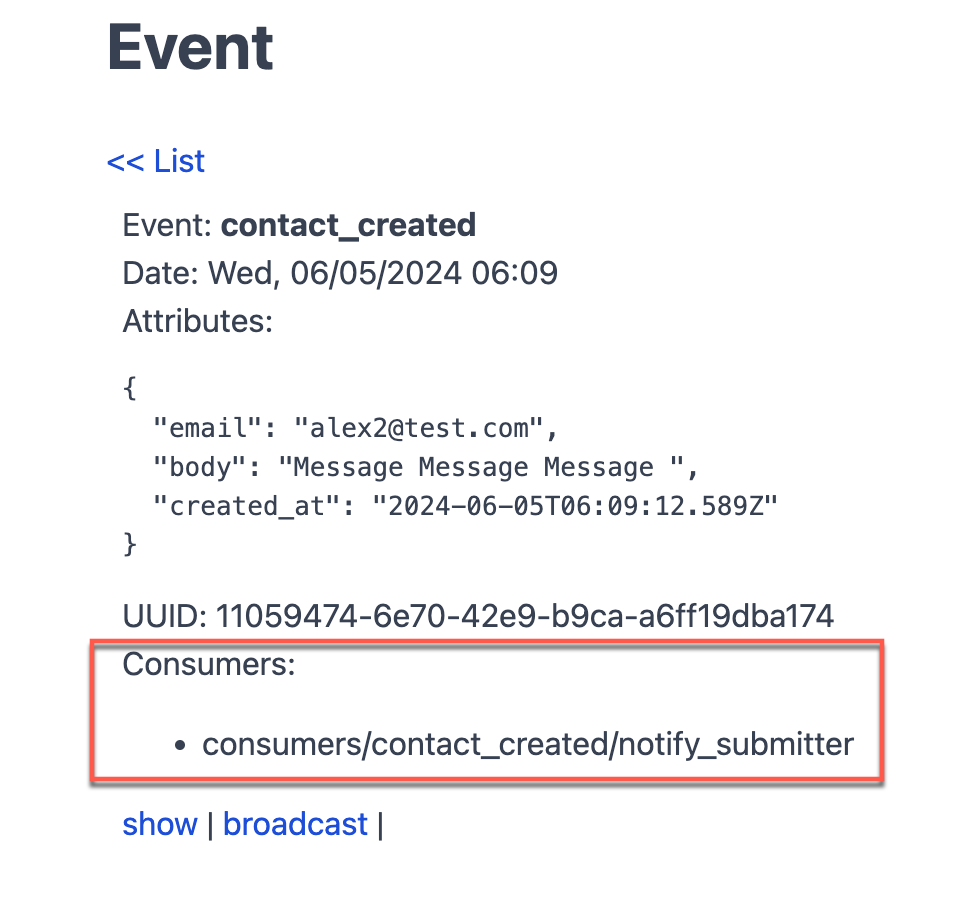
Now if you navigate to /_events, and click on show at a particular event, you should be able to see the consumer we created:
Add log
Add the log statement to the notify_submitter.liquid file (that was empty) to capture the event details:
app/lib/consumers/contact_created/notify_submitter.liquid
{% log event, type: "this is an event from the notify submitted consumer!" %}
Test log
After submitting the form with valid data, navigate to http://localhost:3333/logs to check the log. You should see an entry similar to this:
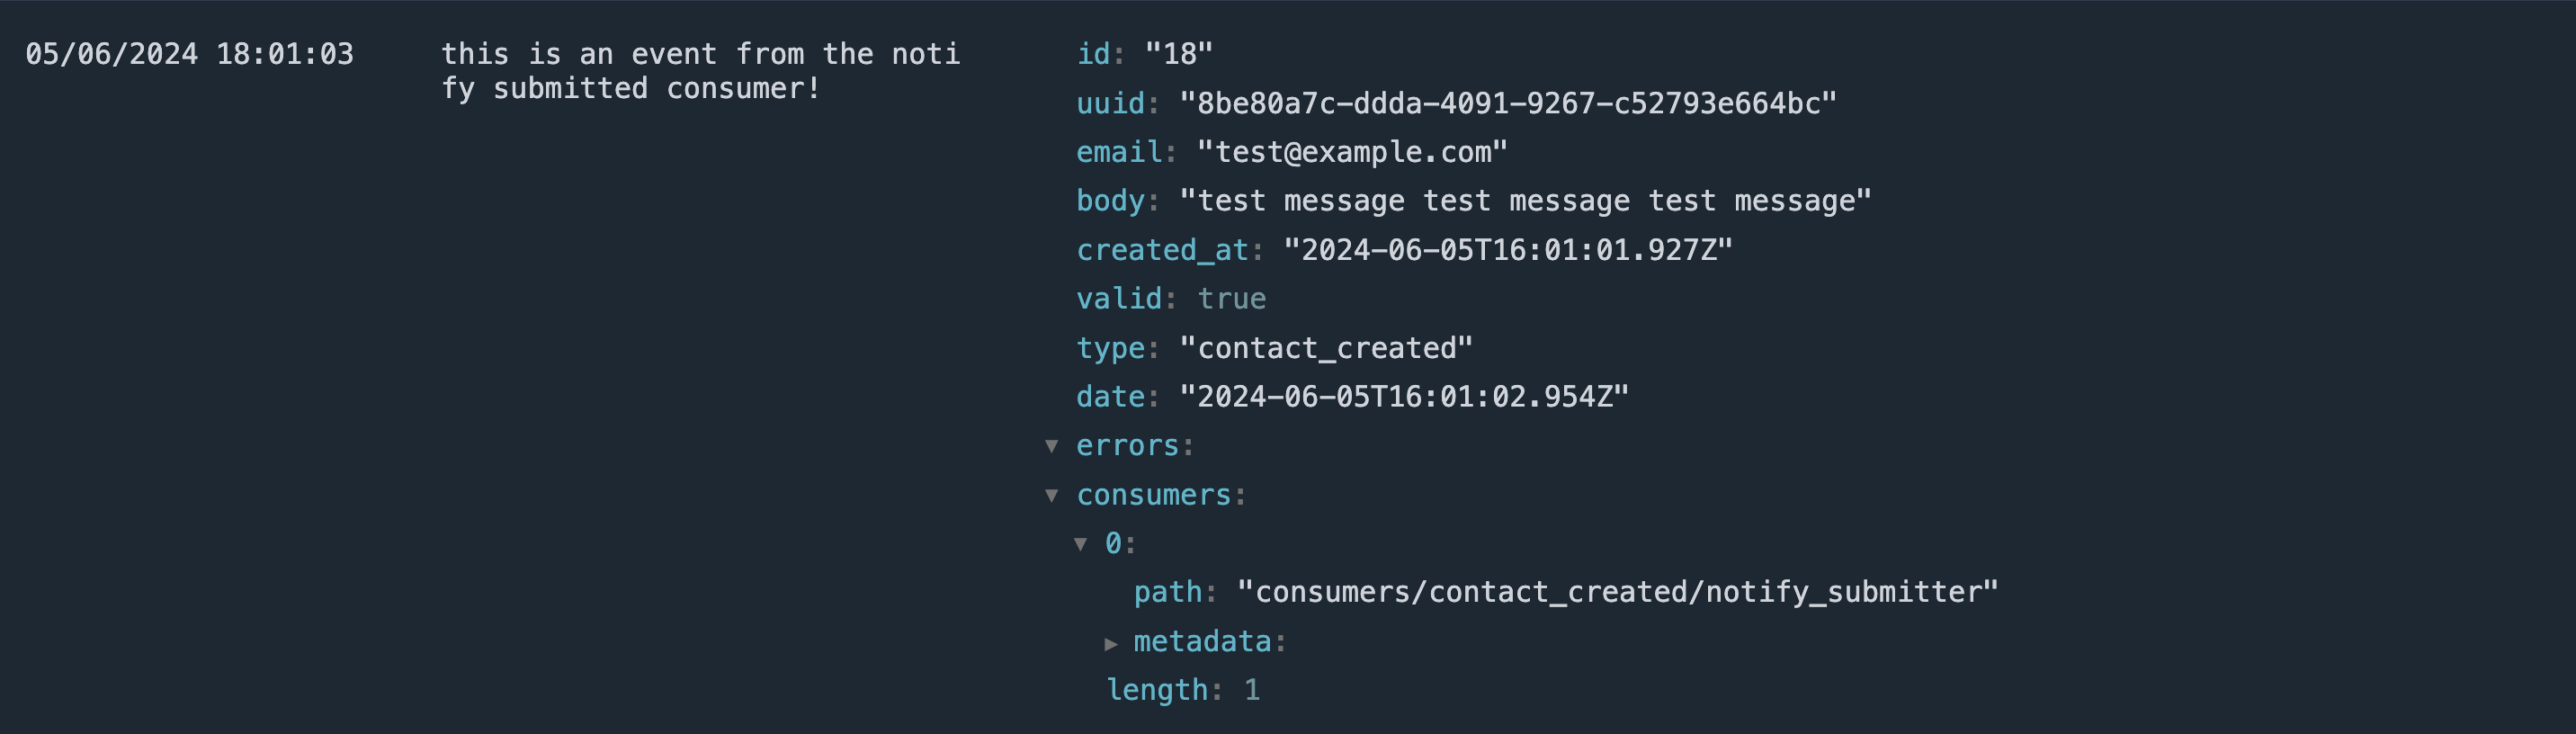
05/06/2024 18:01:03	this is an event from the notify submitted consumer!
id: "18"
uuid: "8be80a7c-ddda-4091-9267-c52793e664bc"
email: "[email protected]"
body: "test message test message test message"
created_at: "2024-06-05T16:01:01.927Z"
valid: true
type: "contact_created"
date: "2024-06-05T16:01:02.954Z"
errors:
consumers:
0:
path: "consumers/contact_created/notify_submitter"
metadata:
length: 1
This completes the process of moving event handling to the page, creating an event consumer, and testing the event consumer with logging.