Working with the Code and Files
One of the core concepts of platformOS is that you never work offline. You edit the files in your local filesystem with your favorite code editor, but you are constantly connected to your instance so that the platformOS engine can interpret and parse your codebase.
You write code locally, but it is executed remotely.
Proper platformOS directory structure
In order for platformOS to understand and properly interpret your code, it needs to be organized in a structured way - see Directory Structure.
The easiest way to get the correct folder structure is by using the pos-cli init command.
Start by creating an empty folder — named platformos-hello in this example — for your project, and then navigate to it from the command line:
mkdir platformos-hello
cd platformos-hello
Now, to automatically create the proper directory structure inside that folder, use:
pos-cli init
This command should return a success message confirming that the directory structure was created.
This means that there are a bunch of new files and folders in your project’s root directory. We’ll explain what they are used for in the next steps of this tutorial, or you can check out the platformOS Directory Structure section of our documentation for technical details.
What you need to know for now is that this command creates an example HTML page with a welcome message.
Authenticate your environment
For pos-cli to know which instance is related to your codebase, you need to connect them. Basically, you tell pos-cli that your code needs to be visible under a specific URL.
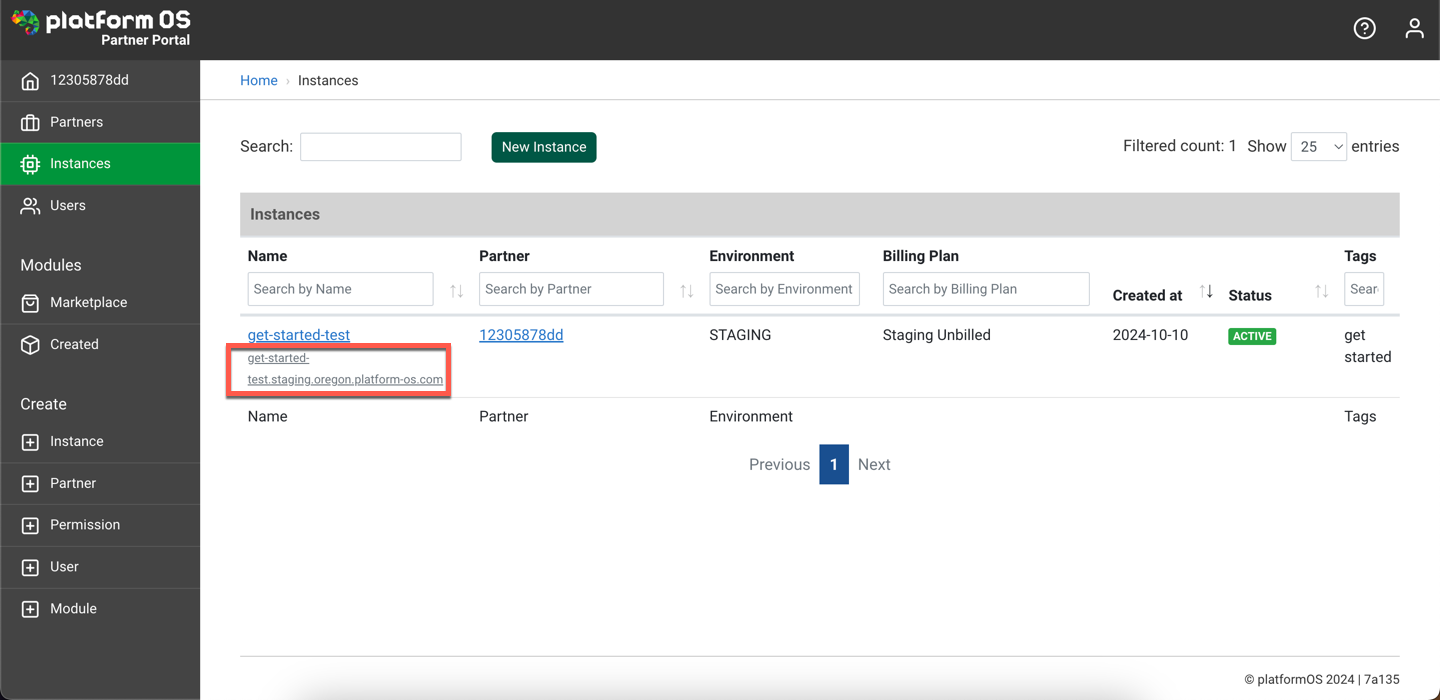
Your instance URL is available in the Partner Portal under the Instances list.
To store your instance URL in the configuration, run a pos-cli env add command with your personal data in the parameters:
pos-cli env add <environment> --url <your instance url>
Note
Run all commands discussed in this tutorial in the project root directory.
You need to give your instance a name in the <environment> parameter. Since you can connect multiple instances to a single codebase, it’s common to have different environments for development and production.
Let’s assume the first instance is for development, so you can name it dev. An example pos-cli command would look like this:
pos-cli env add dev --url https://my-instance.staging.oregon.platform-os.com
After running this command, your default browser will open, asking you to log in to Partner Portal and authorize the app.
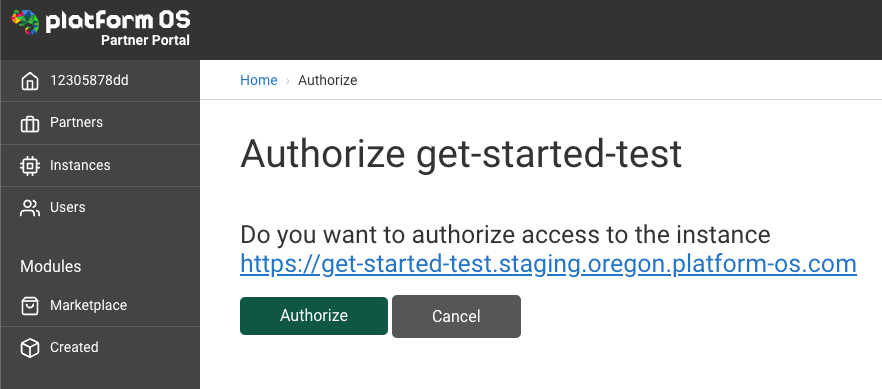
Successful authorization will be confirmed by pos-cli:
Environment <your instance url> as dev has been added successfully.
Upload your code to an instance
When you have an instance, and pos-cli is configured to connect with it, you can deploy your code to make it available under the instance URL.
This process — called deployment — is straightforward. Use the following command in your project’s root directory:
pos-cli deploy <environment>
If you named the alias for your instance dev, the command would look like this:
pos-cli deploy dev
A progress indicator will show the deployment status. Once it finishes, a message will be displayed:
Deploy succeeded after X seconds
After this, enter the URL of your instance in a browser, and it will display the example page you’ve just deployed.
Testing the deployment process
To test the entire deployment process, make some changes in the code.
If you’re following this guide, you should find a file named app/views/pages/index.liquid in your codebase. Open it in your code editor and change any line. For example, locate the line with the welcome message:
<h1>Welcome to your instance!</h1>
Change it to something more personal, like:
<h1>This is my first platformOS instance!</h1>
Save the file and send the codebase to the instance by running the deploy command in the command line again:
pos-cli deploy dev
After refreshing your instance URL in the browser, you should see the new message.
Upload code changes automatically when you save the file
On a daily basis, you’ll want your instance to immediately reflect any changes made in the code with minimal effort.
This process, called syncing, is handled by a pos-cli command run from the root of your project’s directory:
pos-cli sync <environment>
When executing this command you will learn that it does not end by itself. This is a command that you want to run and leave open while you make code changes.
The pos-cli sync command observes your files and automatically uploads any changes to your instance. It only uploads the changed files, making the process fast and efficient.
Syncing in action
To see syncing in action, make another change in the code. Before doing so, start the sync process:
pos-cli sync dev
A confirmation message should appear, indicating that the synchronization has started. Now, find the Hello world title in the app/views/layouts/application.liquid file, and change it to something like Hello beautiful world. Save the file.
In the command line, a confirmation message will appear showing that the page was synced. Refresh the browser to confirm that the new text is displayed.
Syncing also works for static assets, such as images, JavaScript files, and GraphQL queries. Any change in your project will be reflected automatically, including file renaming and deletion.
Basic overview of the directory structure
The pos-cli init command will create all of the required folders for platformOS. The essential directories you need to know are for storing files, web pages, and handling data.
For a detailed explanation of each directory, see our article on Directory Structure. Below are the key directories you need to start:
Assets
Every static publicly available asset is stored in the app/assets folder. Images, JavaScript, fonts, CSS files, or downloadable documents should go here. You can organize your files any way you like, but we recommend the following structure:
app/assets/imagesfor imagesapp/assets/scriptsfor JavaScript filesapp/assets/stylesfor CSS filesapp/assets/fontsfor font files
Page
Every page you want to create should be placed in app/views/pages. You can use pure HTML and extend it with Liquid.
Data handling
Place your schema (database structure in YAML) in the app/schema directory. We are going to walk through creating them in the next sections of this tutorial.
GraphQL queries and mutations are used to get the data from the database or save data in it. All of those queries should go in the app/graphql directory.