Building the User Interface
The basic building block of any web application is its HTML structure. platformOS uses Liquid as a language for creating HTML templates.
In this context, you can think of Liquid as an addition to your HTML that will allow you to split code into smaller fragments, render some repeating parts without actually repeating the code, or showing the data pulled from the database on the page.
Liquid is parsed and executed server-side. All of the operations using Liquid are computed first on the server, and then the result of those operations is sent to the user's browser.
Build the main application layout
The HTML structure of the main page on platformOS is kept in app/views/layouts/application.liquid. Notice the file extension is .liquid – this is going to be a pattern for most of the files related to a page’s structure. Specifically, the file named application.liquid is automatically used as a default structure for all pages in your application.
Start with a very simple HTML structure:
app/views/layouts/application.liquid
<!DOCTYPE html>
<html>
	<head>
		<meta charset="utf-8">
		<title>To do list</title>
	</head>
	<body>
		<h1>My to do list</h1>

		{{ content_for_layout }}
	</body>
</html>
You may notice a new syntax – {{ content_for_layout }}. This is Liquid.
There will be many other tags and uses of Liquid in the future. This particular one is just a special variable, available in the layouts/ directory, that will be automatically replaced by the actual page content defined in other .liquid files. So the content of other pages will be injected in place for {{ content_for_layout }}. This makes the layout file a universal page structure for all of your content.
Tip
Remember that you need to synchronise or deploy your changes to the instance to see the results.
You can see this in action by creating another file – one with the content that will be shown on the index page of your application.
All of the pages (or subpages) of your web application need to be placed in a separate folder: app/views/pages/. Start by creating the index file with a simple text:
app/views/pages/index.liquid
<h2>Hello world!</h2>
Now, when you go to your instance URL, you should see the application title that you defined in application.html.liquid as well as the content of index.liquid. Check out the source, it’s all there!
Add a new page to your application
Let’s assume you would like to add an About me page to your application that will show some personal information, and you would like this page to be available under the /about URL.
On platformOS, this is a straight-forward operation. When you add a new file called about.liquid and save it in app/views/pages/ folder, it will automatically be visible under the /about URL on your instance. The file name basically becomes the URL.
As described above, create a new file called about.liquid in the app/views/pages/ directory:
app/views/pages/about.liquid
<h2>About me</h2>
<p>
	Hello! My name is [your name] and this is my first app built on platformOS
</p>
Now, when you go to <your instance url>/about, you should see the newly created page.
Later on, you might find a need to create more complex URLs that are not entirely based on the file names, but on some query parameters for example. This is all totally possible and it’s described in the Routing section of this documentation.
A To Do App: Necessary Interface Elements
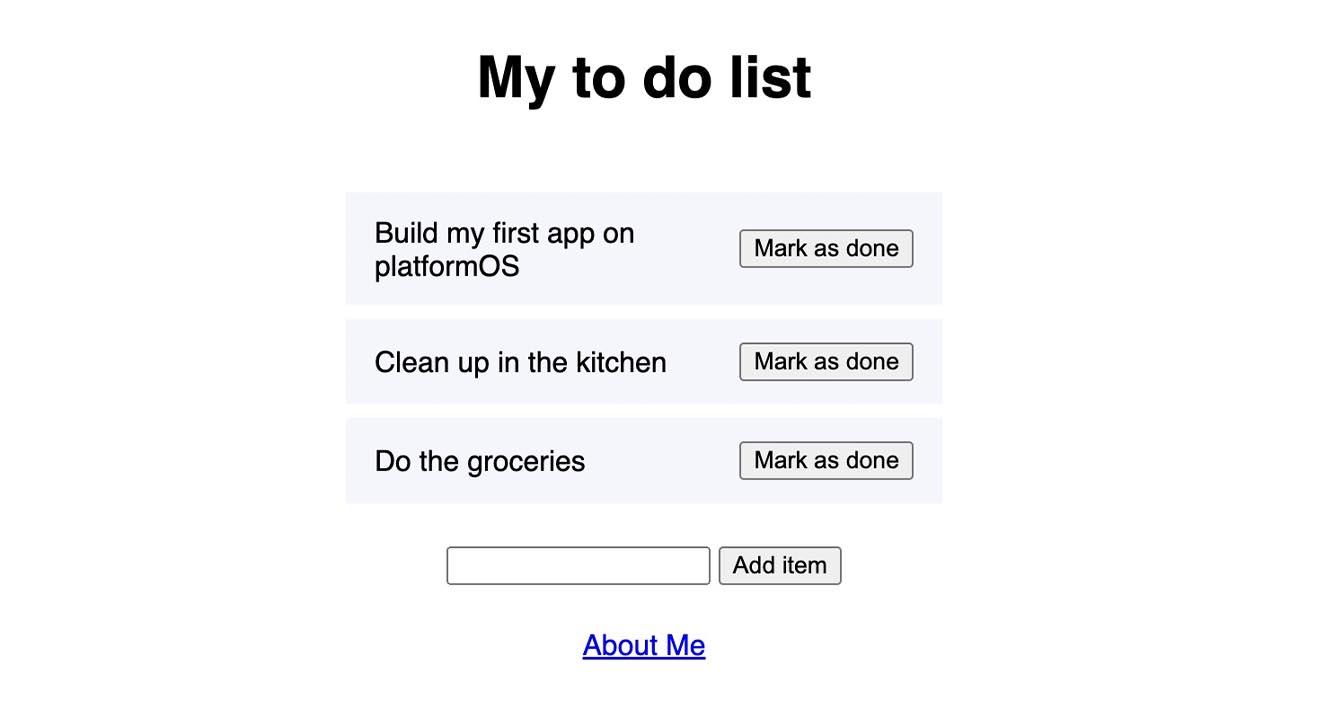
Back to your To Do application. On the index page you would need: a list of items (with a button to mark an item as done), information shown when there are no items, a simple form for adding a new item to the list, and the link to the About me page:
app/views/pages/index.liquid
<!-- list of items -->
<ul>
	<li>
		First item
		<form action="" method="post">
			<button type="submit">Mark as done</button>
		</form>
	</li>
	<li>
		Second item
		<form action="" method="post">
			<button type="submit">Mark as done</button>
		</form>
	</li>
</ul>

<!-- information shown when the list is empty -->
<div>There are no items in the list.</div>

<!-- form for adding new item -->
<form action="" method="post">
	<input type="text" name="title">
	<button type="submit">Add item</button>
</form>

<!-- link to the About Me page -->
<a href="/about">About Me</a>
Currently, you are using example content and don’t have any logic here, that’s OK. You will add those in later steps of this tutorial.
Adding visual styling with CSS
You need a CSS file here. Since the publicly visible static files are placed in the app/assets/ directory, you will save your CSS file as /app/assets/styles/app.css.
We don’t need to get into details here, you can just copy this example CSS to make your app look a little nicer:
app/assets/styles/app.css
body {
    min-height: 100vh;
    display: flex;
    flex-direction: column;
    align-items: center;
    justify-content: center;
    gap: 1.5em;
    font-family: sans-serif;
}

ul {
    margin: 0;
    padding: 0;
    display: flex;
    flex-direction: column;
    gap: .5em;
}

li {
    width: 300px;
    padding: .8em 1em;
    display: flex;
    align-items: center;
    justify-content: space-between;
    gap: 2em;
    background-color: #f5f6fc;
}
You still need to link the CSS file on your page. The proper place for this would be the app/views/layouts/application.liquid:
app/views/layouts/application.liquid
<head>
	[...]
	<link rel="stylesheet" href="{{ 'styles/app.css' | asset_url }}">
</head>
Now, take a look at another Liquid feature: filters. Their function is to modify whatever content you provide to them. To use filters, append the filter name after the pipe character (|). As you can see in the example above, you are using a filter called asset_url. It will take the string that you provide (in this case, the relative path to your CSS file in the /assets folder) and modify it to automatically build the URL to your CSS file.
The asset_url filter is super useful when working with static files. On the one hand, it automatically builds the absolute URL to the file on the platformOS CDN, on the other hand, it appends a query string generated each time the file changes. This is to make sure that your audience always gets the latest version of the file instead of some cached one.
Input:
{{ 'styles/app.css' | asset_url }}
Example output:
https://uploads.staging.oregon.platform-os.com/instances/8675/assets/styles/app.css?updated=1667146184