Saving Data to the Database
Now, let’s test our schema by using the GraphQL Explorer to create a record in our newly defined table.
Test our Schema
Open the GraphQL Explorer (aka GraphiQL at http://localhost:3333/gui/graphql) in your platformOS application.
![]()
Tip
The GraphQL Explorer interface allows you to simulate and verify your GraphQL mutation before fully integrating it into your application.
Copy and paste the following GraphQL mutation into the query editor:
mutation contact_create($email: String!, $body: String!) {
    record_create(
      record: {
        table: "contact"
        properties: [
          { name: "email", value: $email }
          { name: "body", value: $body }
        ]
      }
    ) {
      id
      email: property(name: "email")
      body: property(name: "body")
      created_at
    }
}
Explanation of the GraphQL Mutation
There's a lot going on, so let’s break it down to see what happens:
mutation contact_create($email: String!, $body: String!) {
This line defines the mutation contact_create and specifies that it requires two parameters: email and body, both of which are strings and must be provided (! indicates non-nullable).
record_create(
  record: {
    table: "contact"
    properties: [
      { name: "email", value: $email }
      { name: "body", value: $body }
    ]
  }
) {
This block specifies the record_create mutation, which creates a new record in the contact table. The properties array defines the fields to be populated with the values of $email and $body.
id
email: property(name: "email")
body: property(name: "body")
created_at
These lines define the fields that will be returned after the record is created. This includes the id, email, body, and created_at timestamp.
Provide Data as Variables
Now, use the GraphQL Explorer, and click on Variables at the bottom of the page to expand it.
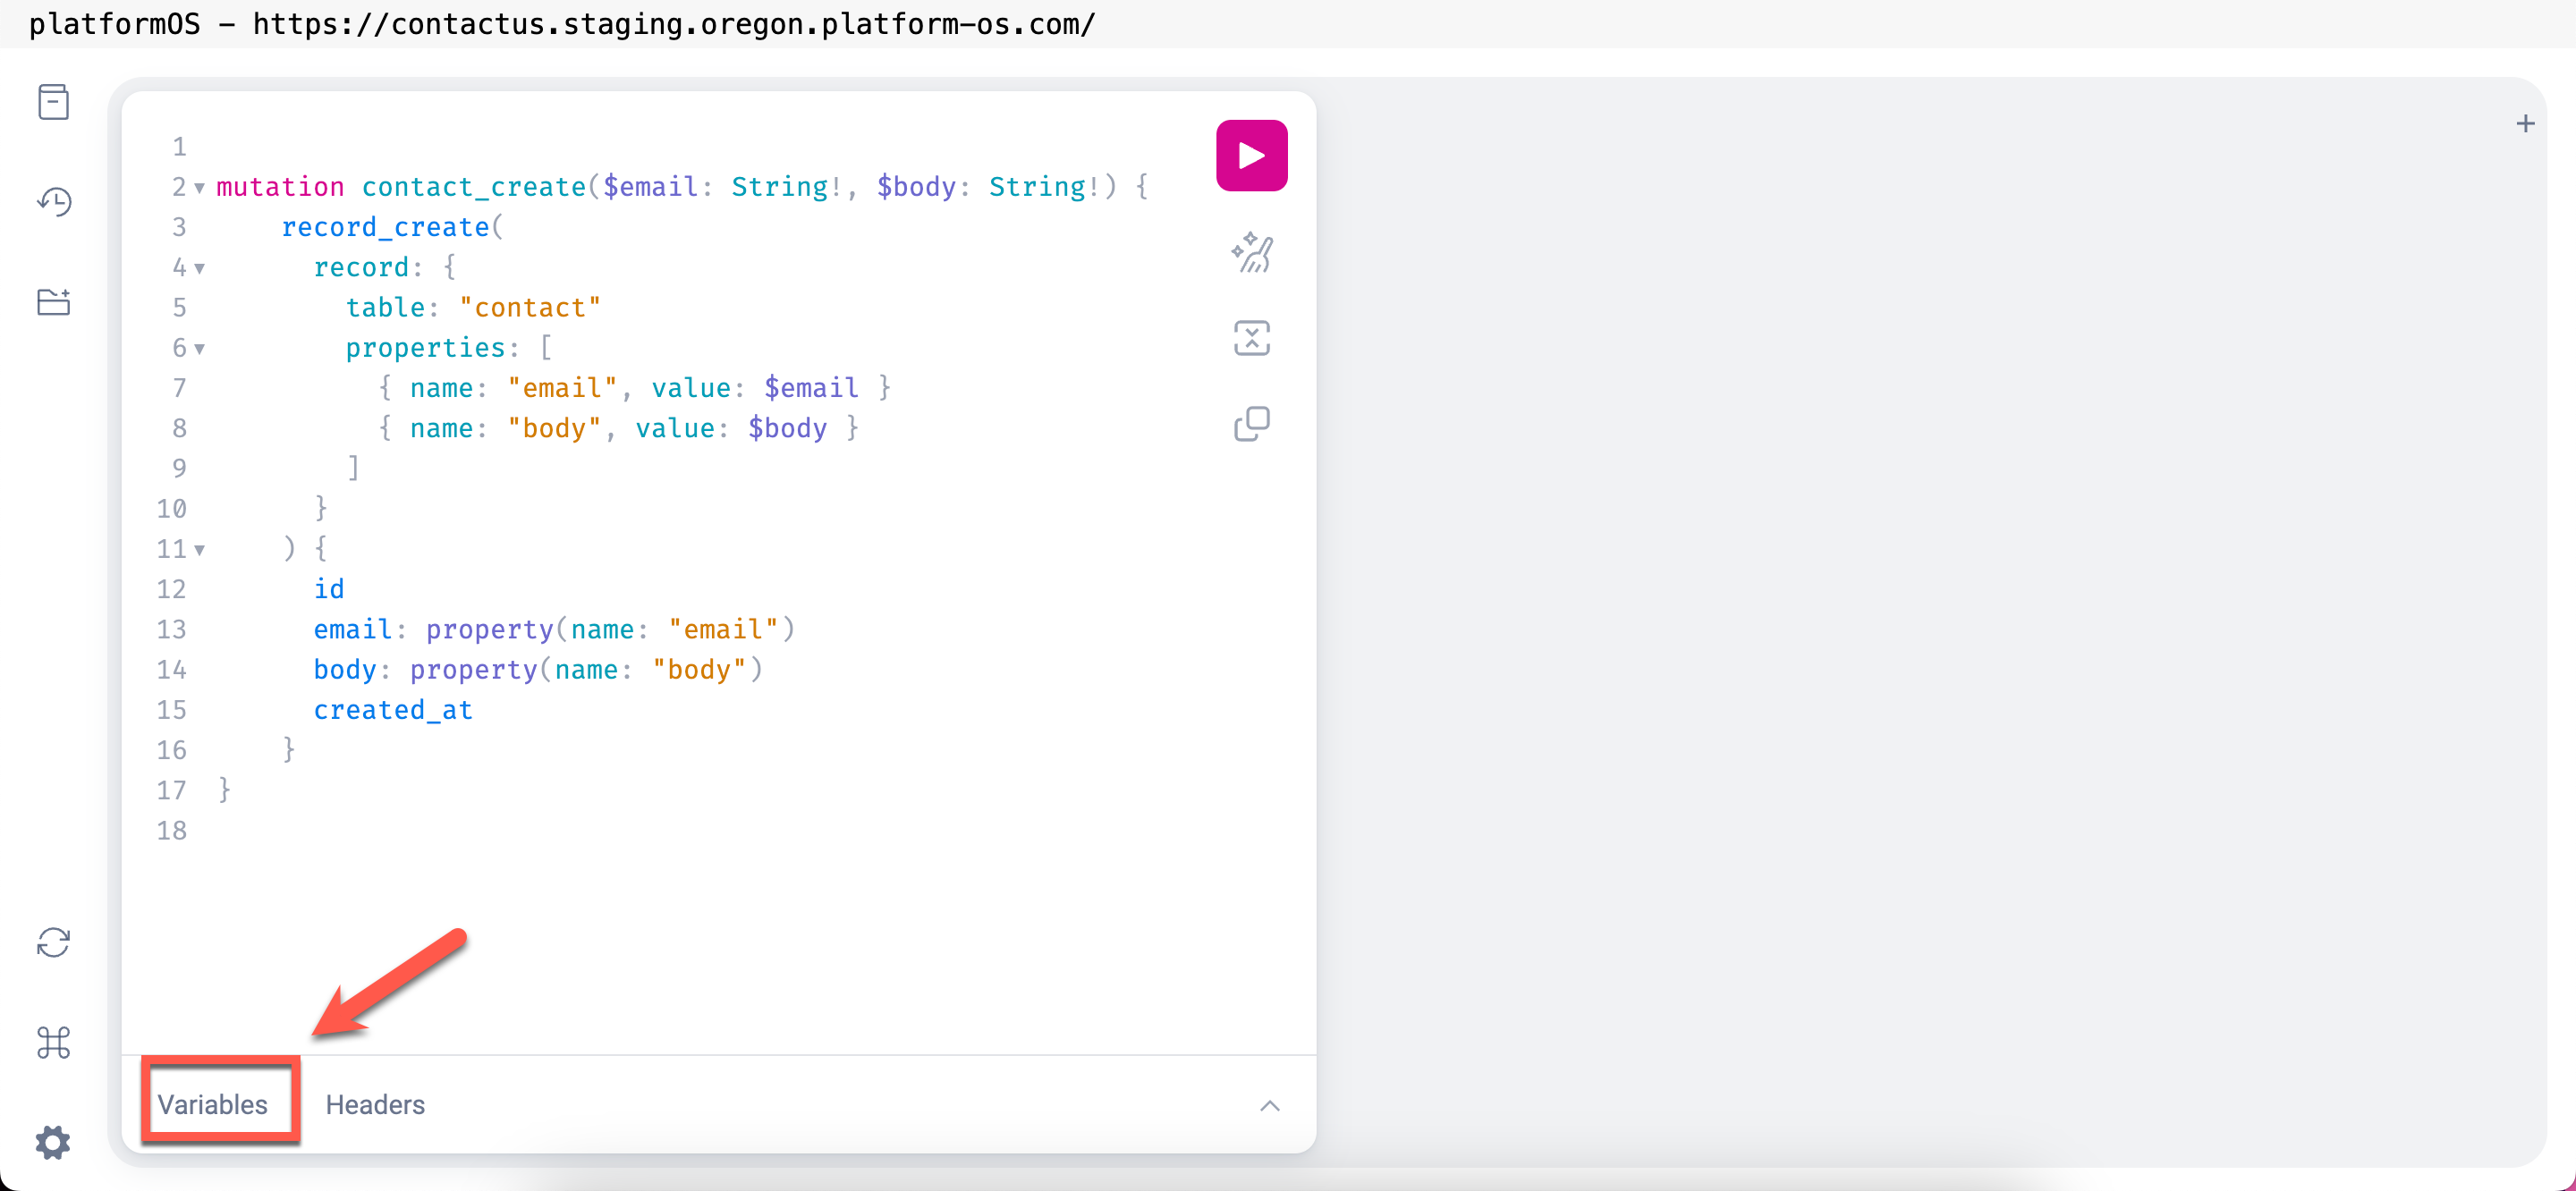
Fill in some test data you want to save into the database:
- For
email, enter a sample email address (for example:[email protected]). - For
body, enter a message (for example:This is my body):
{
    "email": "[email protected]",
    "body": "This is my body"
}
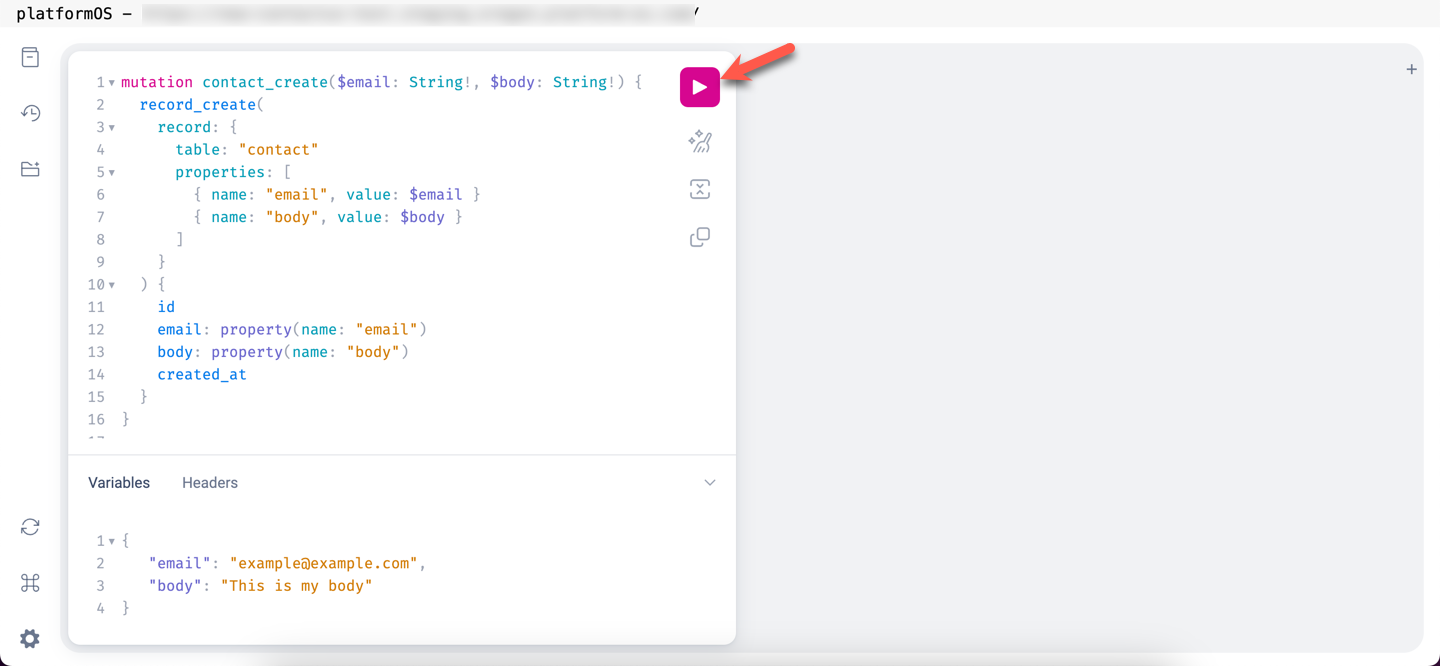
Execute the GraphQL Mutation
Click on the Play button to execute the mutation. When you execute the mutation in the GraphQL Explorer with these inputs, it will create a new record in your contact table using the provided email and body content. Make sure that the table and properties match the schema you've defined in your contact.yaml.
You should see a response similar to the following:
{
    "data": {
      "record_create": {
        "id": "1",
        "email": "[email protected]",
        "body": "This is my body",
        "created_at": "2024-10-17T06:01:04.565Z"
      }
    }
}
Check the Database for New Records
After executing the mutation, let’s see if our record has been successfully created in the database.
Return to the Database (http://localhost:3333/database) and refresh the page.
You should see the new record listed under the contact table, identified by its unique ID (for example: id 1).

Storing GraphQL Queries in the app/graphql/ Directory
While executing queries in the GraphQL Explorer is convenient, platformOS also allows you to store your GraphQL queries in the app/graphql/ directory. Here’s why this method is beneficial:
- Reusability: By storing queries in files, you can easily reuse them in multiple places within your application. This reduces duplication and makes your codebase cleaner.
- Syntax Highlighting and Checking: Using development tools like Visual Studio Code, you benefit from syntax highlighting and error checking, making it easier to write and maintain your queries.
- Organization: Keeping your queries organized in the
app/graphql/directory helps maintain a clear structure in your application, making it easier for developers to find and manage GraphQL operations.
Create the Directory Structure
Navigate to your project root and create the necessary folders for storing GraphQL files:
mkdir -p app/graphql/contacts
Create the GraphQL Mutation File
Inside the app/graphql/contacts directory, create a file named create.graphql.
app/graphql/contacts/create.graphql
Define the Mutation
Open app/graphql/contacts/create.graphql and add the following mutation code (the one we used above in the GraphQL Explorer):
app/graphql/contacts/create.graphql
mutation contact_create($email: String!, $body: String!) {
  record_create(
    record: {
      table: "contact"
      properties: [
        { name: "email", value: $email }
        { name: "body", value: $body }
      ]
    }
  ) {
    id
    email: property(name: "email")
    body: property(name: "body")
    created_at
  }
}
You can then invoke this query in your Liquid templates using the following syntax:
{% graphql result = 'contacts/create' %}
The argument is the file path relative to the app/graphql/ directory, without the .graphql extension.
Inline GraphQL Queries
It is possible to write GraphQL queries inline within Liquid templates. For example:
{% graphql res %}
mutation contact_create($email: String!, $body: String!) {
    record_create(
        record: {
            table: "contact"
            properties: [
                { name: "email", value: $email }
                { name: "body", value: $body }
            ]
        }
    ) {
        id
        email: property(name: "email")
        body: property(name: "body")
        created_at
    }
}
{% endgraphql %}
However, using inline queries can complicate code maintenance, as they are harder to reuse and lack the benefits of tooling support.