Saving Data to the Database
platformOS uses GraphQL to communicate with the database, and YAML to build the database structure. The following tutorial will guide you through using these technologies to store and remove a simple set of data.
Don’t worry if you never used any of these before. Both of them are built in a way that makes it easy to jump right into the development and learn as you go. platformOS offers a set of tools to make the development even easier.
Create the database structure using YAML
As a first step, figure out the structure of the database you need. For this simple example, you will only need a single database table in which you will save the item’s title.
You would also need a unique ID for every record you store, but platformOS creates it automatically, so you don’t really have to think about it.
| ID | Title |
|---|---|
| 1 | Do the groceries |
| 2 | Clean up in the kitchen |
| 3 | Build my first app on platformOS |
To build a database table on platformOS, you will have to create a file that will tell the platform what properties (or columns if you are used to think about the database as a table) you need and what type of data you would like to store in them. Those files need to be placed in a dedicated directory: app/schema/.
To describe the table structure, use the data-serialization language called YAML. For a basic table like yours, create a file named item.yml:
app/schema/item.yml
name: item
properties:
  - name: title
    type: string
In the line 1, you named your table and called it item. Line 2 starts the list of properties that the table will have, and you specify the properties starting with a dash. In this case, you need a single property called title. That property will have to be a string as described in line 4.
YAML is written in a way that makes it easily readable to humans, so it shouldn't be long until you’ll get the hang of it. What is important to remember is that the indentation is very important here as it basically describes the structure and dependencies in it.
For the sake of having a complete picture of the YAML structure, here is an extended example with three properties in the table. (This is an example, don’t copy it for the ToDoList purposes):
name: example
properties:
  - name: name
    type: string
  - name: surname
    type: string
  - name: age
    type: integer
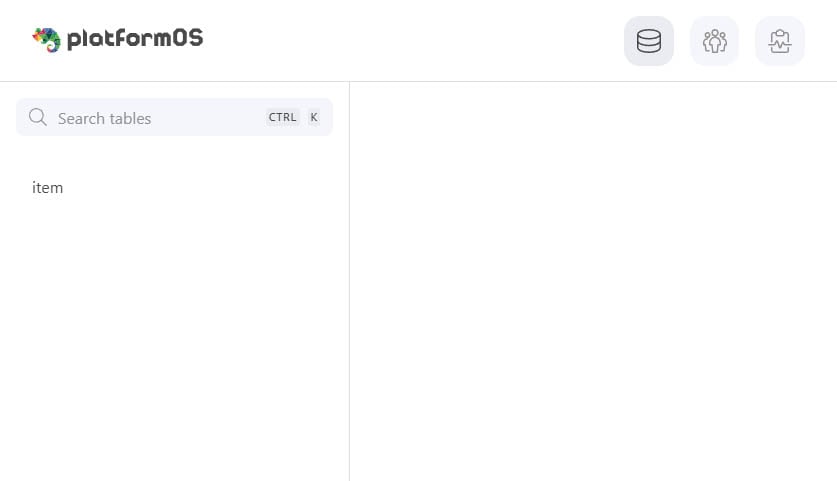
Browse the database tables using a platformOS tool
How can you make sure that the table you’ve just created is really there in the database?
For this purpose, we have created a tool that allows you to browse through the tables and edit the records. Run this command to start the tool:
pos-cli gui serve <environment>
This starts an application to help you administer your instance. When the application is running you can go to http://localhost:3333 in your browser.
There is a selection of tools you can use. The one that will allow you to look at the database is the one in the first box. Click on the Database link to open a list of tables that you created using YAML files.
If everything went right, you should see the newly created item table on the list.
Save the data in the database
To actually save some data in the database, you need to start by creating a GraphQL mutation in the app/graphql/ directory.
In this example, you only have a single table in your application, so you could put the file directly in that folder, but when your application will grow, you might want to consider a more standarized way of organizing the queries.
So, to accommodate for future growth, save the file in app/graphql/item/create.graphql:
app/graphql/item/create.graphql
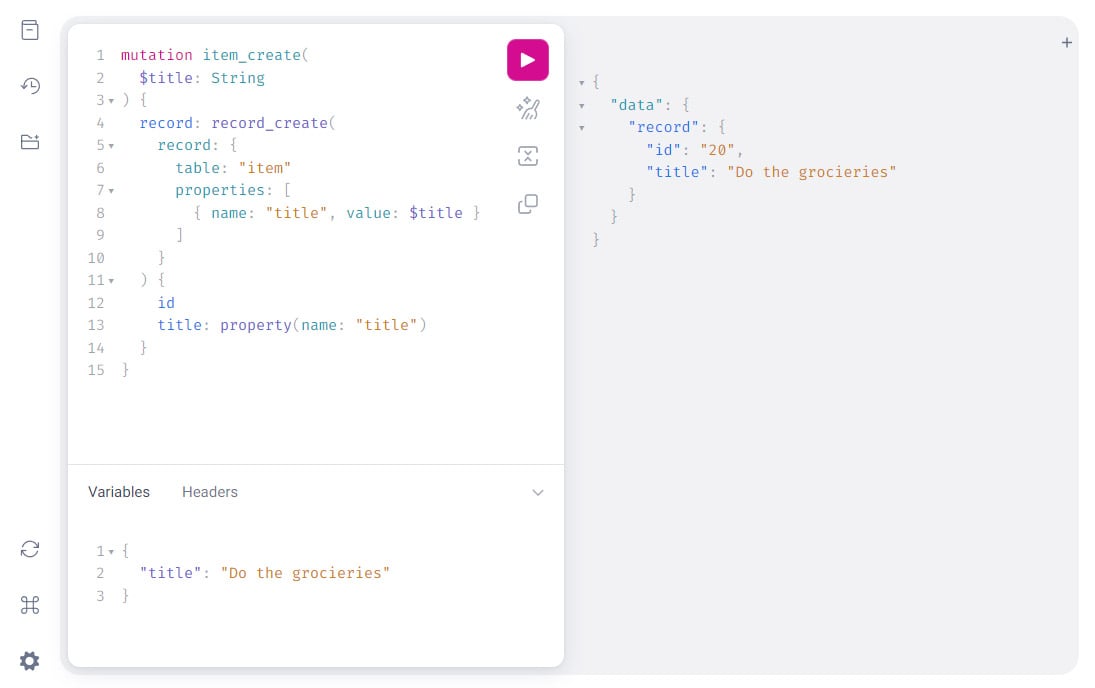
mutation item_create(
  $title: String
) {
  record: record_create(
    record: {
      table: "item"
      properties: [
        { name: "title", value: $title }
      ]
    }
  ) {
    id
    title: property(name: "title")
  }
}
If you have never seen GraphQL before it might feel like there is a lot going on here.
In line 1 you declare a new mutation, that is a name for any operation inserting new data or modifying an existing one. You give the mutation a name item_create. Those names are there mostly for your convenience.
In line 2 you define the variables that you will pass to the database as well as their types. The variables in GraphQL are preceded with the dollar sign ($).
In line 4, you use the function that will create a new record in the database.
Line 6 defines which table you would like to save your new record to.
From line 7, you start to list all of the properties that you want to update, and you use the variable defined in line 2 to save it in the given property. So you will save the variable $title in the property called title of your table item.
There is also line 12. Each query you run will return some data. This is the line where you can define what you want to get back after running the query. In this case, you will want the query to return an id of the newly created record and the title that was saved to the database. The returned result will be a hash (or an object if you are coming from the JavaScript world).
Test the query
The query is written and saved in a .graphql file. How can you be sure the query does what you want it to?
In the toolset available when pos-cli gui serve is running, you have an app called GraphiQL. This is a tool that allows you to test your queries. In the top text field, remove the pre-populate code and paste your query. Then, expand the bottom panel called Query variables. Pass the variables you defined for the query here. So, in your case it can be:
{
  "title": "Do the groceries"
}
Clicking the big play button at the top will run the query. Its result should be available in the right panel. If everything went well, you should see the id and title exactly as you requested for the query results.
{
  "data": {
    "record": {
      "id": "1",
      "title": "Do the groceries"
    }
  }
}
Please remember that the queries you run in GraphiQL are operating on an actual database for your instance! This means that if you remove any data, it will be actually removed from your database.
This also means, that after running your query, you can now go to the Records section of the pos-cli gui serve tool and see the first item in the item table (like described in the section above).
Saving user input in the database
To save the data that the user provided in the application you need three things: a form with an input, a GraphQL query that will save the data and a page that will become a bridge between the user input and the query.
If you are following this tutorial, you already have a form on your index page, you just wrote the GraphQL query, so the only thing left would be to build a page that will take the data from the <form> and pass it to the query.
To do this, create a new page: app/views/pages/item/create.liquid:
app/views/pages/item/create.liquid
---
method: post
---

{% liquid
	graphql result = 'item/create', title: context.params.title

	if result.record.id
		redirect_to '/'
	else
		echo 'Something went wrong'
		echo result.errors
	endif
%}
The page you are creating will accept some data from the user, so you want it to be available when it will be requested with the POST http method. On platformOS, you define the method that the page will be available for in the page configuration section. This section is called frontmatter and it needs to be placed on top of the page. The configuration needs to be placed between the lines with three dashes (---).
---
method: post
---
When you want to write more Liquid than a single line, put the code between {% liquid %} tags.
{% liquid
 [...]
%}
This is a place where you execute your GraphQL query. You run the query located in app/graphql/item/create.graphql, but you don’t need to pass the whole path, as the platform knows where to look for the queries. You defined a variable called $title in your graphql, so you need to pass it to the query, but you don’t want it to be empty, that’s why you assign a value context.params.title to it. All query params passed to the page will be always available in the context.params variable.
graphql result = 'item/create', title: context.params.title
Your GraphQL query will return the id and the title of the record you’ve just added. In this line you will make sure the query ended successfully by checking if the id is present in the results.
if result.record.id
If the query worked, you might want to redirect the user from your /item/create page to the index page using Liquid’s redirect_to tag.
redirect_to '/'
In case something with the query went wrong, show the error that the GraphQL returns.
else
  echo 'Something went wrong'
  echo result.errors
endif
If you have never seen Liquid before, don’t worry, the syntax will become familiar after a little bit of using it.
The last thing left for you to do before testing would be to add the URL to your newly created page in the <form> so that when the user submits the form, it will redirect to the page that controlls the process of saving the data. Let’s get back to app/views/pages/index.liquid and update the code:
app/views/pages/index.liquid
<form action="/item/create" method="post">
Testing the flow
To test the whole flow, get to the homepage of your application, put some text in the input field, and click the Add item button.
Remember that you don’t pull the data from the database yet, so nothing on the page will actually change. That’s no problem since you know that you can browse database records using the tools from pos-cli gui serve.