Implementing Social Media Preview Cards
Promoting content on social media is an important part of marketing. If you want to make sure your posts/tweets/stories stand out on the user's wall, you probably want to provide additional metadata to your content that will not only inform search engines about your content but also improve the appearence of social media cards.
You can use Open Graph tags (also known as OG Tags) to control how URLs are displayed when shared on social media. They make content more eye-catching in feeds, tell visitors what the content is about at a glance, and help Facebook understand the content, which can help increase brand visibility through search.
Problem
When we started posting content on social media we noticed that our social media cards were missing images, descriptions. We decided to fix that on our documentation website and it proved to be pretty easy to do.
To check if your site is already optimized, use the following official tools:
- Twitter: https://cards-dev.twitter.com/validator
- Facebook: https://developers.facebook.com/tools/debug
- LinkedIn: https://www.linkedin.com/post-inspector
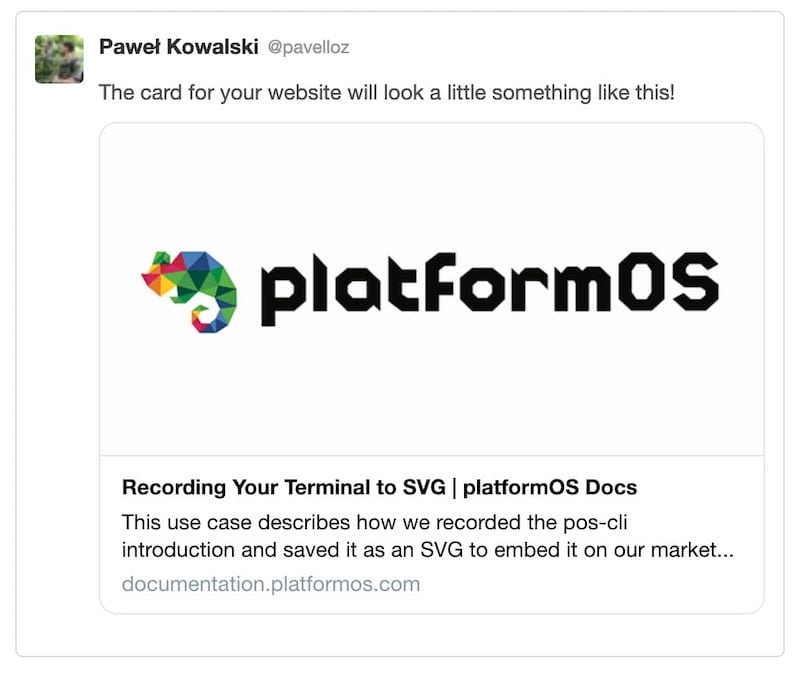
Ideally what you want to have is a title, a description and an image showing up.
Solution
Most of the metadata we used are standard OpenGraph.
OpenGraph (Facebook, LinkedIn)
If you need more information about any of the properties used, read the OpenGraph official documentation.
<meta property="og:locale" content="en_US" />
<meta property="og:type" content="article" />
<meta property="og:site_name" content="platformOS Documentation" />
<meta property="article:section" content="Uncategorized" />

<meta property="og:title" content="{{ title }}" />
<meta property="og:description" content="{{ description }}" />
<meta property="og:url" content="{{ context.location.url }}" />

<meta property="article:published_time" content="{{ dates.created_at }}" />
<meta property="article:modified_time" content="{{ dates.content_updated_at }}" />
<meta property="og:updated_time" content="{{ dates.content_updated_at }}" />

<meta property="og:image" content="{{ 'images/pos-logo.png' | asset_url }}" />
<meta property="og:image:width" content="730" />
<meta property="og:image:height" content="412" />
We hardcoded some of the metadata because we did not think we needed to make it dynamic. You might want to also add author - consult the documentation to choose the best tags for your use case.
Here's an explanation for the dynamic parts:
title: a variable that we calculate based on what is in the current page metadata. We reused our title tag content here.description: same as above, we reused our usual meta data description content hereimage: absolute URL to the image. The image we used is 713x412px, but you can experiment with dimensions that fit your content/logo better.url: absolute URL to the page (with query params if essential)published_time: date when the content was first published - learn below how we got thedatesobjectmodified_time: datetime when the content was last modified - learn below how we got thedatesobjectupdated_time: datetime when the content was last modified - learn below how we got thedatesobject
Dates
We did not use dates before, so we needed to pull those from the database using GraphQL. We used the admin_pages endpoint, filtered one page with the slug of the current page and pulled the date of file creation and the date of the last edit of the page body (not including metadata like title).
{% graphql page_dates, slug: context.page.slug %}
query get_dates($slug: String!) {
  admin_pages(
    per_page: 1
    filter: { slug: { value: $slug } }
  ) {
    results {
      content_updated_at
      created_at
    }
  }
}
{% endgraphql %}

{% assign dates = page_dates | fetch: 'admin_pages' | fetch: 'results' | first %}
Twitter uses its own set of metadata to extract for its cards preview.
<meta name="twitter:card" content="summary_large_image" />
<meta name="twitter:description" content="{{ description }}" />
<meta name="twitter:title" content="{{ title }}" />
<meta name="twitter:image" content="{{ 'images/pos-logo-2to1.png' | asset_url }}" />
Here's an explanation of new elements:
card: there are a couple of different card types that Twitter supports, we chosesummary_large_imagebecause it shows the image in a prolific wayimage: Twitter requires the image to be in 2:1 aspect ratio forsummary_large_imageor it will not show, so we prepared another image for that reason
Results
The difference in visibility is pretty big but what's more important, users are able to instantly tell what the link is about before they click it.
Before:

After:
Structured data
After you have prepared your OpenGraph metadata, it is also a good idea to add so called structured data into your website.
Structured data helps search engines find and understand your content and website. It is organized and tagged with specific groups of text that help search engines understand the context of that information and can return accurate results to searchers.
This metadata is sometimes used by websites to generate rich snippets instead of OpenGraph. Additionally, this data is used by search engines to populate their rich snippets. Using structured data you can describe your content in detail. Because of that, it is more flexible. It is possible to describe the relation between entities (author, image, website). The more correct details you provide (within reason), the better.
Example
<script type='application/ld+json'>
{
  "@context": "https://schema.org",
  "@graph": [
    {
      "@type": "WebSite",
      "@id": "https://documentation.platformos.com",
      "url": "https://documentation.platformos.com",
      "name": "platformOS Documentation",
      "inLanguage": "en-US",
      "description": "Examples, tutorials, references, APIs, and best practices—everything you need to build future-proof applications on platformOS"
    },
    {
      "@type": "ImageObject",
      "inLanguage": "en-US",
      "url": "https://files.ps-01-platformos.com/instances/123/assets/images/pos-logo.png?updated=1781774260",
      "width": 730,
      "height": 412,
      "caption": "platformOS Documentation"
    },
    {
      "@type": "WebPage",
      "url": "https://documentation.platformos.com/use-cases/implementing-social-media-preview-cards",
      "name": "",
      "description": "",
      "isPartOf": {
        "@id": "https://documentation.platformos.com"
      },
      "inLanguage": "en-US",
      "primaryImageOfPage": {
        "@id": "https://files.ps-01-platformos.com/instances/123/assets/images/pos-logo.png?updated=1781774260"
      },
      "datePublished": "",
      "dateModified": "",
      "potentialAction": [
        {
          "@type": "ReadAction",
          "target": [
            "https://documentation.platformos.com/use-cases/implementing-social-media-preview-cards"
          ]
        }
      ]
    }
  ]
}
</script>
We basically recycled data we used in OpenGraph, with very simple relations.
Resources
When you develop your own structured data, validate it on https://search.google.com/structured-data/testing-tool/u/0/ - it will show you warnings and errors should you encounter them.
Read the standard specification on: https://schema.org/docs/documents.html
Read these articles to get more practical information than from the official documentation:
- Understand how structured data works by Google
- Create SEO Juice From JSON LD Structured Data in Drupal by Lullabot
- How to Add Structured Data to Your Website by Neil Patel
- Everything you ever wanted to know about unfurling but were afraid to ask /or/ How to make your site previews look amazing in Slack by the Slack Platform Blog